

Why Your Bathroom Faucet Deserves an Upgrade
That dripping faucet in your bathroom might sound like a small issue, but it could be a symptom of larger problems. It’s not just the annoying drip, drip, drip keeping you awake; it’s the subtle wear and tear hinting at a necessary upgrade. A worn faucet can significantly impact your daily bathroom routine.
Mineral deposits can accumulate, staining the fixture and reducing water flow. This not only looks unsightly but can also create a breeding ground for bacteria. A leaky faucet can also increase your water bills, wasting both water and your money. Ignoring a faulty faucet now can lead to more expensive repairs later.
Beyond the Drip: Signs It’s Time for a New Faucet
Several signs indicate it’s time to replace your bathroom faucet. Weak water pressure makes simple tasks like handwashing or brushing your teeth frustrating. Temperature swings, from scalding to freezing, can make showering unpleasant and potentially dangerous. You might be interested in browsing our sitemap for more helpful guides: our sitemap with more how-to guides.
- Persistent Leaks: Even a small drip wastes water and increases your bills.
- Low Water Pressure: Reduced flow suggests internal faucet issues.
- Temperature Fluctuations: Inconsistent temperatures make showering uncomfortable.
- Mineral Buildup: Stains and discoloration indicate mineral deposits impacting the faucet’s internal parts.
- Difficulty Operating the Handle: Stiff or loose handles indicate wear within the faucet mechanism.
Bathroom faucets typically last 15 to 20 years with proper maintenance, such as cleaning with vinegar and a microfiber cloth. However, cheaper models might wear out faster due to inferior materials, requiring more frequent repairs or replacements. Upgrading to a WaterSense labeled faucet can significantly reduce water usage.
The Benefits of a Faucet Upgrade
Replacing your faucet isn’t just about fixing a leak; it’s a chance to improve your entire bathroom experience. A new faucet can enhance both the functionality and the aesthetics of your space.
- Improved Water Efficiency: Modern faucets incorporate water-saving features that lower your water consumption and utility bills.
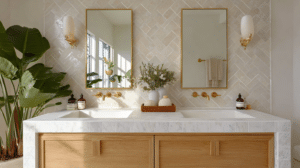
- Enhanced Aesthetics: A new faucet instantly updates your bathroom, adding a touch of modern style.
- Increased Functionality: Features like a pull-down sprayer or touchless operation simplify everyday tasks.
- Increased Home Value: A stylish, functional bathroom can increase your home’s resale value.
By recognizing the signs of a failing faucet and understanding the benefits of an upgrade, you can transform your bathroom into a more functional, efficient, and stylish room. This small change can significantly improve your daily life and the overall value of your home.
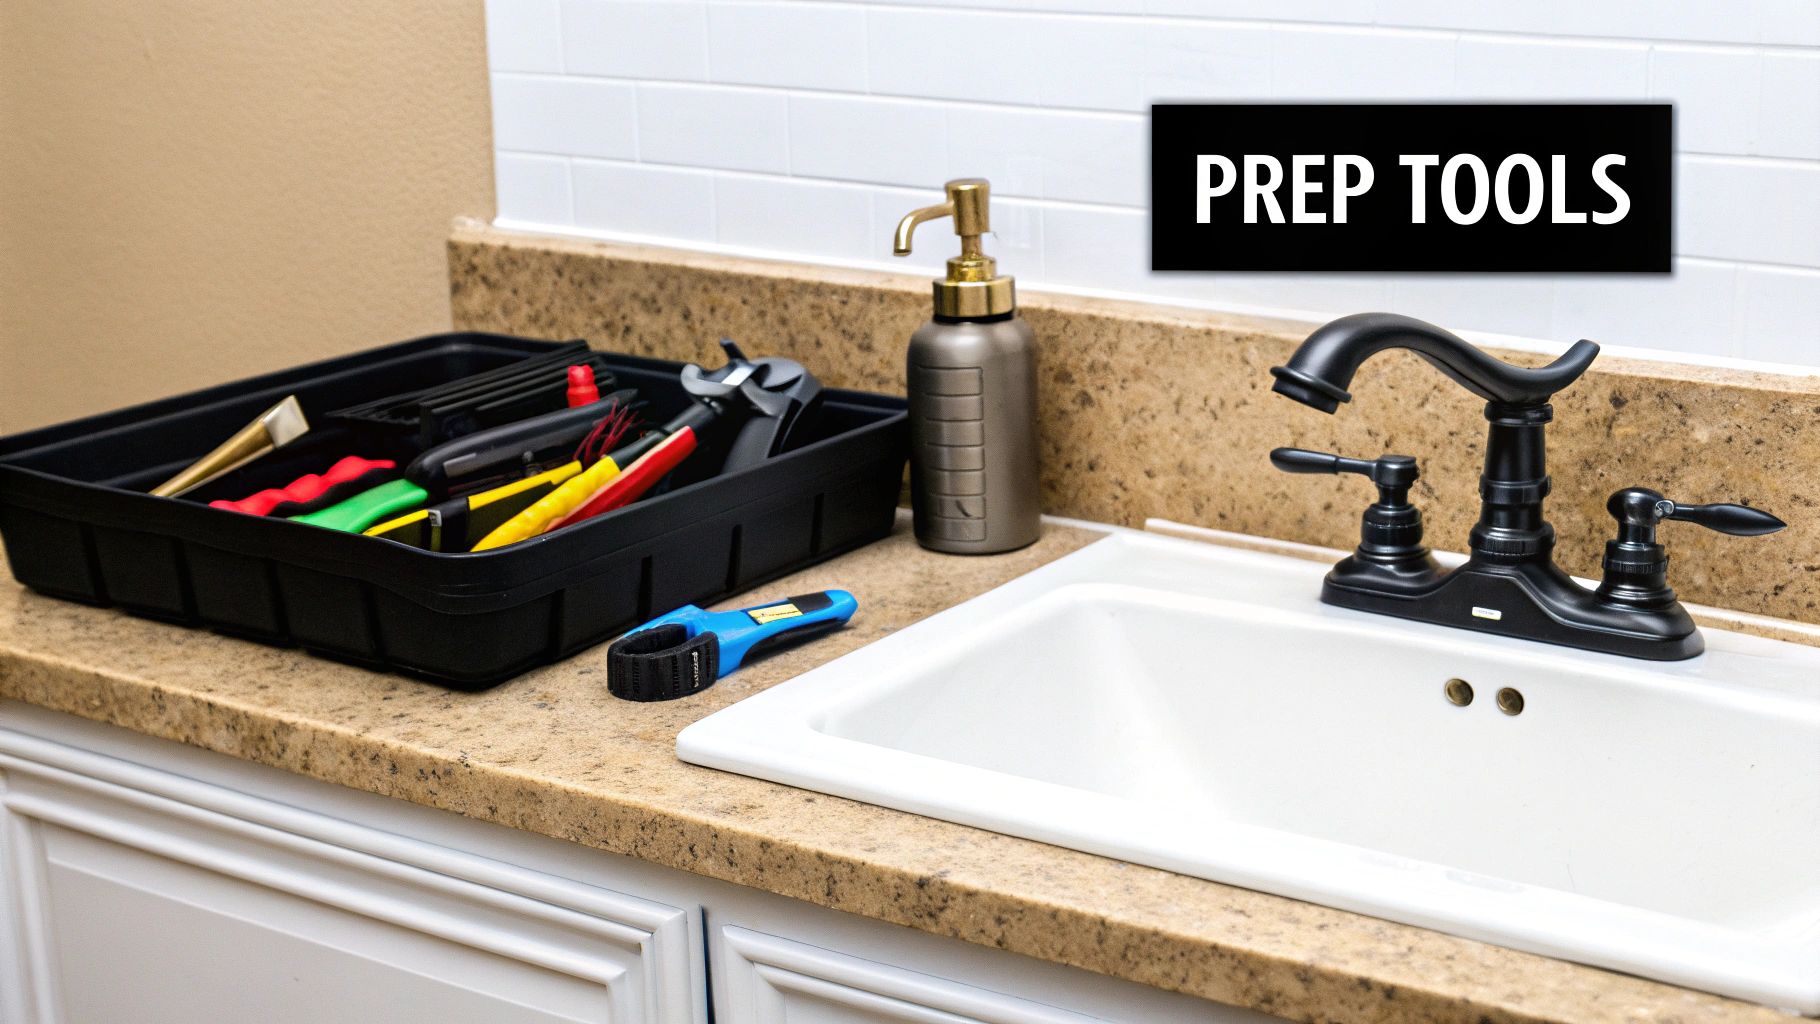
Gathering Your Faucet Replacement Arsenal
So, you’ve decided your old bathroom faucet needs an upgrade. Great! A little planning goes a long way before you begin. This means gathering the necessary tools and materials to avoid frustrating mid-project runs to the hardware store. It’s like prepping for a delicious meal – you wouldn’t start cooking without all the ingredients, would you?
Must-Have Tools and Materials
Having the right tools can mean the difference between a seamless installation and a plumbing disaster. Here’s what you’ll need:
- Adjustable Wrench: Crucial for loosening and tightening various connections. A basin wrench is especially helpful for those hard-to-reach nuts under the sink.
- Screwdrivers: You’ll need both Phillips and flathead screwdrivers for removing handles and other components.
- Pliers: Useful for gripping and turning small parts. Channel-lock pliers provide extra versatility.
- Supply Tubes: These connect the faucet to the water supply lines.
- Plumber’s Putty: Creates a watertight seal around the faucet base.
- Teflon Tape: Seals threaded connections to prevent leaks.
- Bucket and Towels: For catching spills and protecting your vanity.
- Safety Glasses: Protecting your eyes from debris is essential.
Before we dive into the installation process, let’s review the tools you’ll need. The following table outlines the essential tools and materials for faucet replacement, their purpose, whether they’re essential or optional, and their estimated cost.
Essential Tools for Faucet Replacement
| Tool/Material | Purpose | Essential/Optional | Estimated Cost |
|---|---|---|---|
| Adjustable Wrench | Loosening/tightening connections | Essential | $10-20 |
| Basin Wrench | Loosening/tightening nuts in tight spaces | Optional | $15-25 |
| Screwdrivers (Phillips & Flathead) | Removing handles and components | Essential | $5-15 |
| Pliers | Gripping and turning small parts | Essential | $10-20 |
| Channel-lock Pliers | Gripping and turning various sized parts | Optional | $15-30 |
| Supply Tubes | Connecting faucet to water lines | Essential | $5-10 |
| Plumber’s Putty | Creating a watertight seal | Essential | $3-5 |
| Teflon Tape | Sealing threaded connections | Essential | $2-4 |
| Bucket | Catching spills | Essential | $5-10 |
| Towels | Protecting surfaces | Essential | Varies |
| Safety Glasses | Eye protection | Essential | $5-10 |
Having these tools readily available will make your project much smoother.
Measuring and Choosing the Right Faucet
Before heading to the store, measure your sink configuration. This helps you choose a compatible faucet and avoid returns. Note the number of mounting holes and the distance between them. Replacing a bathroom faucet can be budget-friendly if you plan well. The average cost is around $270, ranging from $170 to $360, depending on the faucet type and installation.
Prepping for a Smooth Installation
A few preliminary steps can make the entire process much easier.
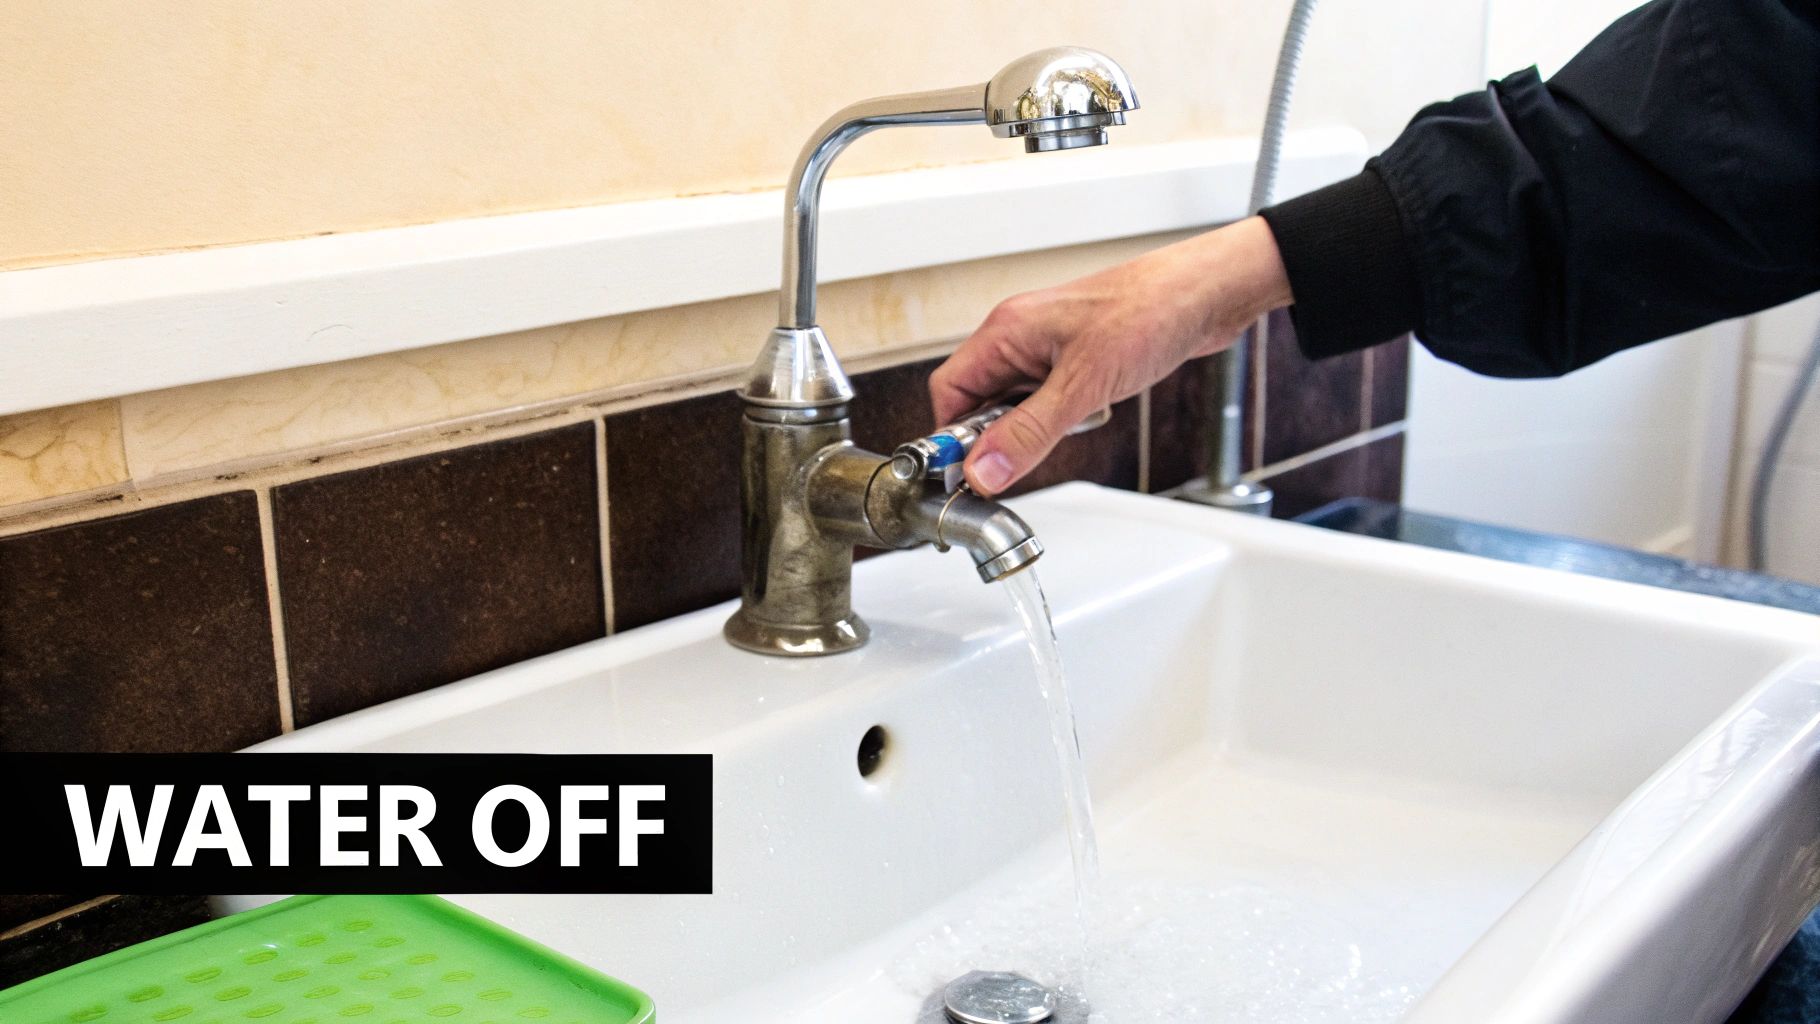
- Turn off the water supply: Locate the shutoff valves under your sink and turn them clockwise to shut off the water. This prevents flooding.
- Clear the area under the sink: Remove any cleaning supplies or other items to create a comfortable workspace.
- Place a bucket under the sink: This will catch any remaining water in the lines.
- Take pictures: Before removing anything, take pictures of the existing plumbing. This can be helpful during installation. You might be interested in: Our Product Sitemap.
By gathering the necessary tools, measuring correctly, and prepping your workspace, you’ll be ready to tackle your faucet replacement project confidently. Proper preparation is key to a successful and stress-free project, leaving you with a beautiful, functional new faucet. Now, you’re ready to remove that old faucet!
Out With the Old: Removing Your Existing Faucet
Removing your old faucet might seem like the toughest part of a replacement, especially if it’s been in place for years. But don’t worry, with a little patience and the right tools, you can handle this like a pro. This guide will walk you through the process, offering solutions to common problems and ensuring a smooth removal. Think of it as carefully deconstructing a Jenga tower—precision and planning are essential.
Disconnecting the Water Supply Lines
First and foremost: turn off the water. This crucial step prevents any unexpected flooding. Find the shutoff valves under your sink, typically marked “hot” and “cold.” Turn them both clockwise to shut them off completely. Then, turn on the faucet to release any remaining water pressure. A little sputtering is perfectly normal.
Now, you can disconnect the supply lines. Position a bucket under the sink to catch drips. Use an adjustable wrench to loosen the nuts connecting the supply lines to the faucet tails. These can be difficult to turn, especially in older installations. If they’re really stuck, a basin wrench offers the extra leverage you need.
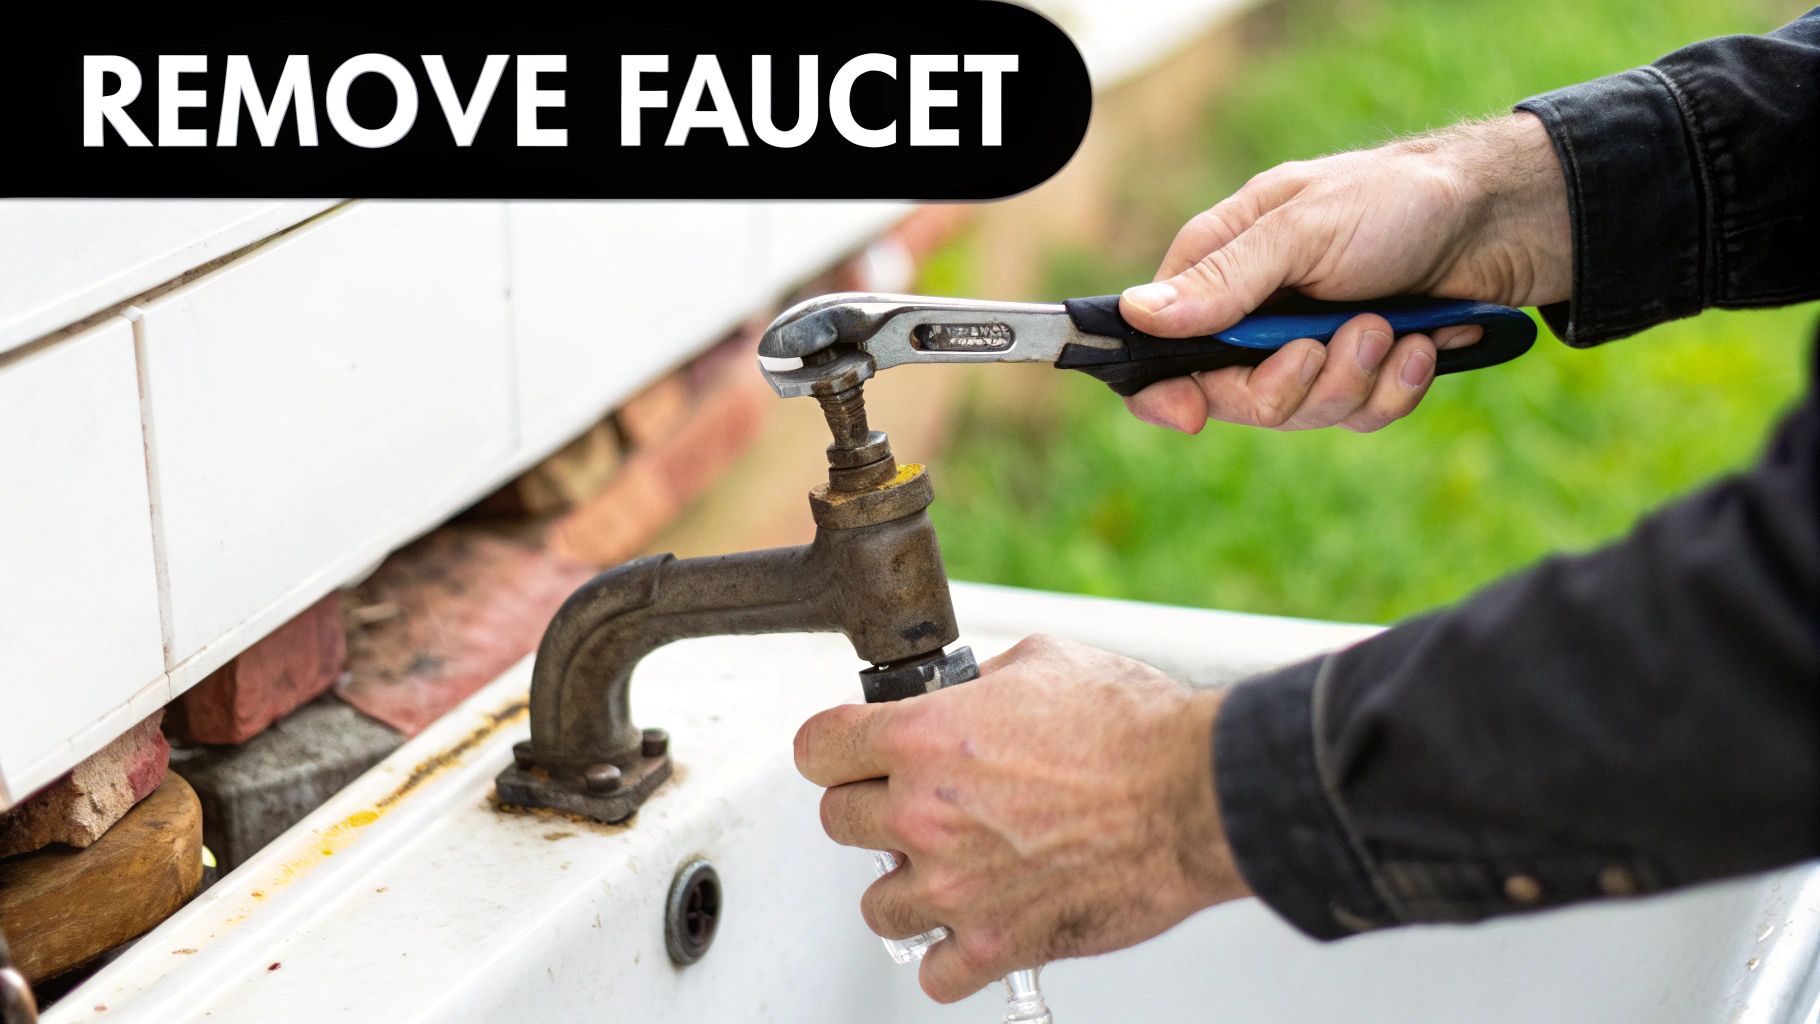
Loosening the Faucet Mounting Nuts
Next, locate the mounting nuts securing the faucet to the sink. These are usually underneath, in a tight spot. A basin wrench is invaluable here. Its swiveling head and long handle help you reach and loosen those nuts, even in confined spaces. If the nuts are corroded, penetrating oil can help. Apply it and let it sit for a few minutes before trying again.
Check our installation sitemaps for more helpful information. Replacing a bathroom faucet has several steps, from disconnecting the old faucet to connecting the new one. While DIY is possible, a professional can save time and avoid potential issues. Professional replacement can cost between $499 and $702, depending on the complexity and materials. Consider additional expenses like debris disposal.
Removing the Old Faucet
Once the mounting nuts are loose, the faucet should be almost ready to come out. Carefully lift and wiggle it free from the sink. You might encounter resistance from old plumber’s putty or caulk. A putty knife can help break the seal. With the faucet removed, clean the sink surface, preparing it for the new installation. Removing the old faucet is key to a successful replacement.
Dealing with Stuck Faucets
Sometimes, a faucet simply won’t budge, even with your best efforts. Don’t force it! You could damage your sink or plumbing. Here are a few extra tips if you’re struggling:
- Apply more penetrating oil: Let the oil work, even overnight.
- Heat the nuts: A heat gun can loosen stubborn connections, but use caution to avoid overheating the area.
- Call a plumber: If nothing else works, call a professional. They have the tools and experience for tough situations.
By following these steps, even first-time DIYers can successfully remove their old bathroom faucet. Patience and the right tools are key for this critical part of your faucet replacement project. Now that the old faucet is out, you’re ready to install your new one!
In With the New: Installing Your Dream Faucet
With the old faucet removed, the exciting part begins: installing your new dream faucet! This is the moment your bathroom truly transforms. We’ll guide you through each step, from positioning the new faucet to ensuring watertight connections. Think of it like assembling a cherished model – each piece has its place, and the result is something to be proud of.
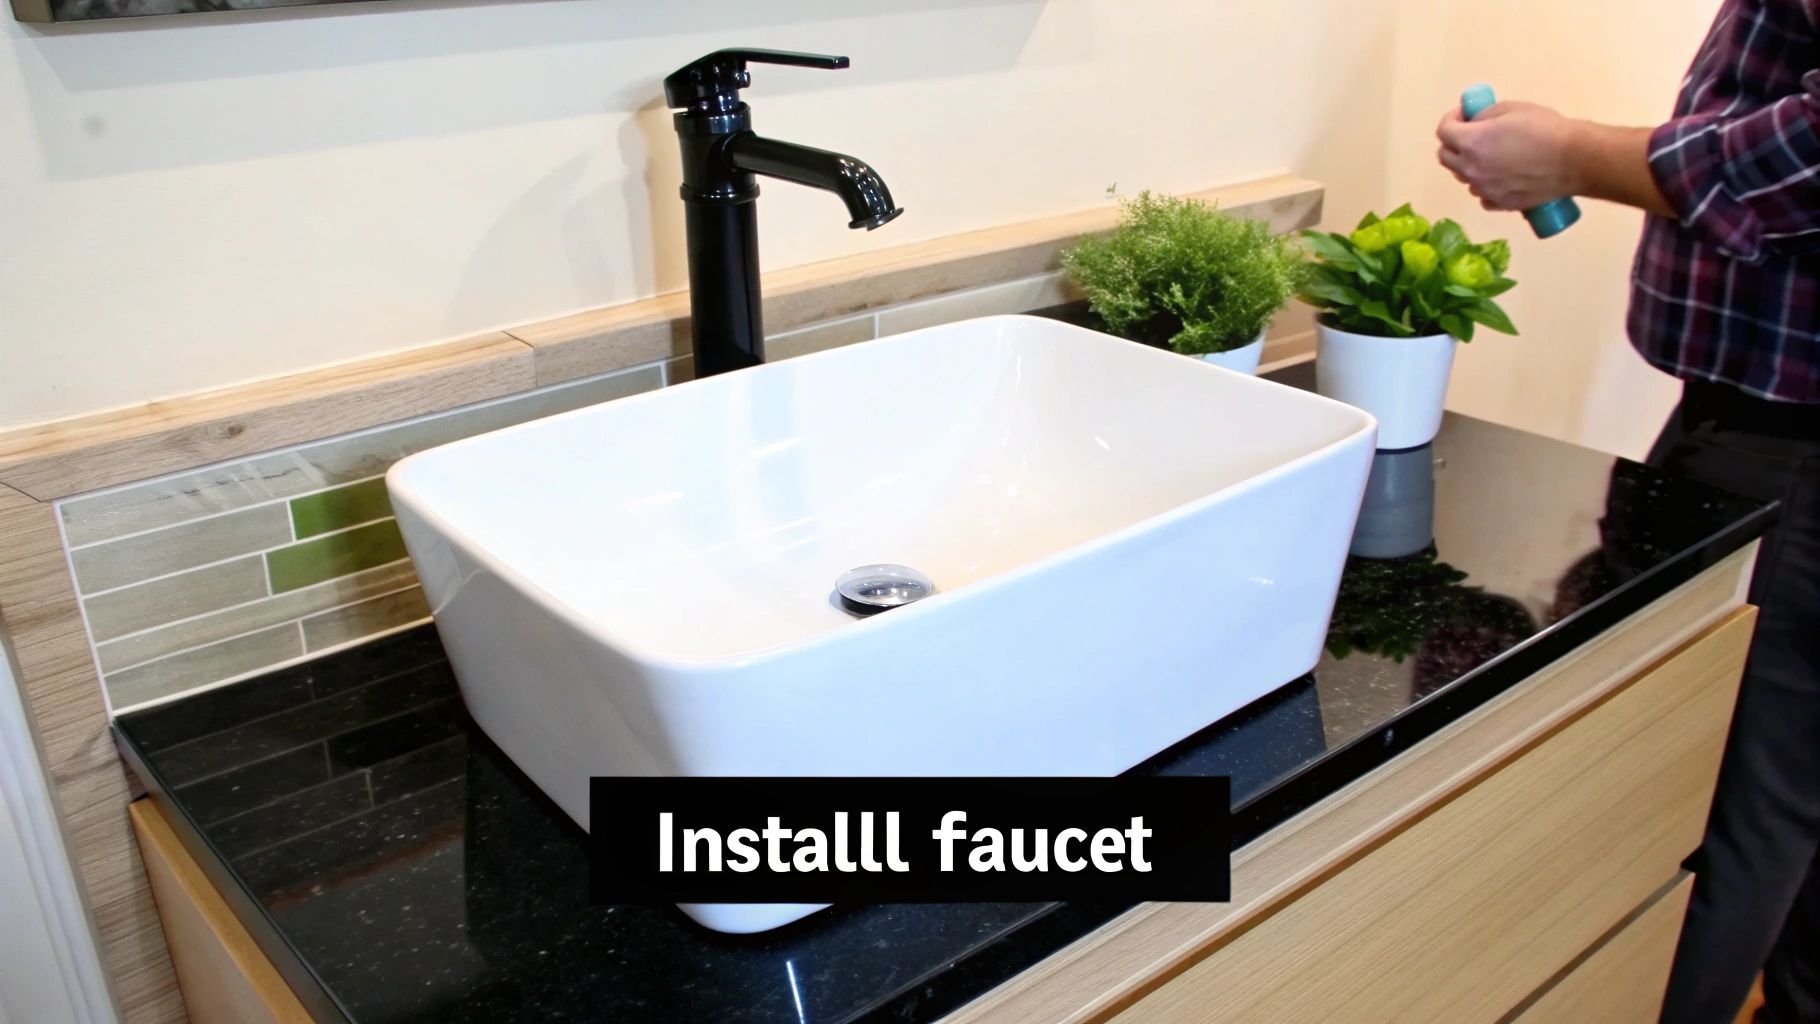
Positioning and Securing the Faucet
Carefully position the new faucet into the designated mounting holes in your sink. Ensure proper alignment before tightening. From under the sink, thread the mounting nuts onto the faucet shanks. Hand-tighten initially, then use a basin wrench to securely tighten. Avoid overtightening, as this can damage both the sink and the faucet.
Creating Watertight Seals
A leak-proof seal is crucial. Apply a generous ring of plumber’s putty around the faucet base where it contacts the sink. This creates a barrier against water seepage. As you tighten the mounting nuts, the putty will be compressed, forming a tight seal. Remove any excess putty with a damp cloth for a neat finish.
Connecting the Water Supply Lines
Connect the new supply lines to the faucet tails. Use an adjustable wrench to tighten the nuts, ensuring a secure connection. Connect the other ends of the supply lines to the shutoff valves under the sink. Remember to hand-tighten first, then finalize with the wrench.
Installing the Drain Assembly
This crucial step, often overlooked in tutorials, is essential for preventing leaks and ensuring efficient drainage. Consult your faucet’s manufacturer’s instructions. Generally, the process involves connecting the drain flange to the sink drain and then connecting the pop-up assembly to the faucet linkage.
Testing for Leaks
With all connections made, it’s time to test for leaks. Slowly turn the shutoff valves back on, listening for hissing or dripping. Turn on the faucet and check for leaks around the base, supply lines, and drain connections. If a leak is detected, tighten the connection. If the leak persists, disassemble and recheck the seal, potentially using more plumber’s putty or Teflon tape.
Fine-Tuning and Adjustments
Once leak-free, make final adjustments. Adjust the handle for smooth operation and comfortable water temperature. You can also adjust the water flow rate. Clean the faucet and the surrounding area.
Specific Installation Tips for Different Faucet Styles
While general installation principles apply, different faucet styles may have specific requirements.
- Single-Handle Faucets: Simpler installation with fewer connections.
- Widespread Faucets: Require more precise alignment during installation.
- Centerset Faucets: Integrated connections simplify installation.
Always refer to the manufacturer’s instructions for specific guidance.
Handling Common Installation Challenges
Even with careful preparation, challenges may arise.
- Tight Spaces: A basin wrench and a small mirror are helpful.
- Stubborn Connections: Penetrating oil and a heat gun can loosen stuck nuts.
- Misaligned Parts: Double-check measurements and alignment before final tightening.
By following these instructions and addressing potential issues, you can install your new bathroom faucet effectively. The transformation is complete, resulting in a beautiful, functional, and leak-free faucet for years to come. Enjoy your upgraded bathroom!
Troubleshooting: When Your Faucet Fights Back
Even the simplest faucet installation can occasionally present a challenge. But before you call a plumber, let’s empower you with the knowledge to handle common post-installation issues. It’s similar to learning to drive; there will be bumps in the road, but you can learn to navigate them effectively.
Common Faucet Problems and Solutions
The following table outlines typical issues you might encounter after installing a new faucet, along with their potential causes, solutions, and prevention tips. Consider it your go-to quick reference guide for faucet troubleshooting.
| Problem | Possible Causes | Solution Steps | Prevention Tips |
|---|---|---|---|
| Dripping Faucet | Worn-out O-rings or cartridges, loose parts | 1. Turn off the water supply. 2. Disassemble the faucet handle and spout. 3. Inspect and replace O-rings or cartridges. 4. Reassemble and test. | Regularly check for leaks and address them promptly. |
| Low Water Pressure | Clogged aerator, mineral buildup in supply lines | 1. Remove and clean the aerator. 2. Flush the supply lines. | Install a water softener or filter to reduce mineral buildup. |
| Inconsistent Water Temperature | Malfunctioning cartridge or mixing valve | 1. Turn off the water supply. 2. Replace the cartridge or mixing valve. 3. Test the temperature control. | Ensure proper installation and avoid overtightening connections. |
| Unusual Noises (e.g., squeaking, banging) | Loose parts, high water pressure | 1. Check for loose connections and tighten. 2. Install a pressure-reducing valve if needed. | Regularly check for loose parts and maintain proper water pressure. |
Diagnosing the Root Cause
Sometimes a simple solution can resolve the problem. A dripping faucet might only require a new O-ring, while low water pressure might be due to a clogged aerator. For instance, a squeaking noise could indicate loose parts. Tightening the connections might be the only necessary action.
When to Tighten, When to Replace
Knowing when to tighten a connection versus replacing a part is essential. If tightening doesn’t resolve a leak, the part itself may be worn and need replacing. If you’re uncertain, it’s always best to replace the suspected part. This proactive approach prevents bigger issues later.
Is it Your Installation or a Defective Product?
If you’ve carefully followed the installation instructions and still encounter problems, the faucet itself could be defective. Contact the manufacturer about warranty information. They might offer a replacement or repair service.
Preventative Maintenance: Keeping Your Faucet Happy
Just like a car, your faucet needs regular maintenance. Simple habits can prolong its life and prevent future problems. Regularly clean your faucet with mild soap and water to remove mineral deposits and prevent staining. Periodically inspect for leaks and fix them immediately. This prevents minor issues from becoming major headaches. By taking these preventative measures, you can ensure your faucet operates smoothly for years to come.
Saving Water Without Sacrificing Performance
Upgrading your bathroom faucet isn’t just about aesthetics; it’s an opportunity to significantly reduce your water consumption. Modern faucets offer innovative ways to conserve water without compromising the comfort and convenience you expect. Think of it like upgrading to a fuel-efficient car: you still reach your destination, but you consume less fuel.
The Power of Efficient Faucet Technology
Today’s faucets utilize clever engineering to deliver a satisfying flow while using less water. Aerators, for example, mix air with the water stream, creating a full, robust feel while minimizing water usage. This technology is similar to how a chef whips cream to add volume with less actual cream.
Innovative flow technologies represent another key water-saving advancement. These designs carefully manage the water’s volume and velocity, providing a powerful and efficient flow without unnecessary waste. You might be surprised at how enjoyable a water-efficient shower can be.
WaterSense: Your Guide to Water-Efficient Choices
The WaterSense label, provided by the EPA, simplifies your search for water-efficient fixtures. WaterSense-labeled faucets use a maximum of 1.5 gallons per minute (gpm), a substantial reduction compared to older models, which can use 2.2 gpm or more. This might appear to be a minor difference, but the savings accumulate over time.
By replacing outdated faucets with WaterSense models, households can save almost 11,000 gallons of water over the faucet’s lifespan. On a larger scale, if everyone switched to WaterSense faucets, the combined savings could reach nearly $1.6 billion annually in water and energy costs. These efficient designs guarantee adequate flow while considerably reducing water waste.
Small Changes, Big Impact
Beyond selecting a water-efficient faucet, minor changes in your daily routines can magnify your water savings.
- Turn off the faucet while brushing your teeth: This simple action can conserve gallons of water each week.
- Fix leaks promptly: Even a small drip can waste a considerable amount of water over time.
- Consider shorter showers: Reducing your shower time by even a couple of minutes can make a significant difference.
- Install a low-flow showerhead: This complements your water-efficient faucet, further decreasing your water usage.
These seemingly minor adjustments, combined with a WaterSense-labeled faucet, can substantially reduce your water footprint and lower your utility bills without compromising the comfort and performance you want.
Balancing Performance and Conservation
Opting for a water-efficient faucet doesn’t mean sacrificing a satisfying shower or a strong stream for handwashing. Modern technologies ensure you receive the performance you desire while minimizing water waste. The key is to seek features like aerators and advanced flow technologies that optimize both water usage and user experience. By making informed choices and adopting simple habits, you can enjoy a comfortable and practical bathroom while promoting a more sustainable future.
The Future at Your Fingertips: Smart Faucet Innovations
While a traditional faucet upgrade is a solid improvement, the world of bathroom fixtures is constantly evolving. Even if you’re not quite ready to embrace the latest technology, understanding these innovations can inform your current choices and prepare you for the future of bathroom design. Let’s explore the exciting developments in smart faucet technology.
Touchless Technology: Hygiene and Convenience
Touchless faucets are gaining popularity for several compelling reasons. They offer improved hygiene by eliminating the need to touch handles, a particularly important benefit in shared bathrooms. Furthermore, they promote water conservation, as water flows only when needed. With increasing reliability and affordability, touchless faucets are becoming a practical upgrade for many homeowners.
Voice Control: Seamless Bathroom Experiences
Imagine starting your day by simply asking your faucet to run water at your preferred temperature. Voice control integration is making this a reality. Smart home technology allows you to integrate voice-activated smart faucets into your home ecosystem, streamlining your bathroom routine. This feature is particularly helpful for those with limited mobility.
Precision Temperature Control: Personalized Comfort and Safety
Smart faucets offer a new level of temperature control. Digital displays and programmable settings allow you to select your ideal temperature, eliminating guesswork and the risk of scalding or icy surprises. Some models even incorporate automatic shutoff features for added safety and water conservation.
The Growing Faucet Market: Reflecting Innovation
The global faucets market is experiencing significant growth, demonstrating the demand for modern and efficient fixtures. As of 2023, the market reached a value of $18 billion and is projected to grow at an annual rate of 8.3% between 2024 and 2032. This growth is fueled by technological advancements, including the increasing popularity of touchless and motion-sensing faucets. These features enhance both hygiene and user experience, attracting a wider range of consumers. Rising affluence in the Asia Pacific region is a key driver, as more homeowners seek premium bathroom products.
Smart Features: Value vs. Novelty
While many smart features offer genuine advantages, it’s crucial to distinguish between true value and novelty. Consider your lifestyle, budget, and practical needs when evaluating smart faucet options. Features like leak detection and automatic shutoff provide valuable protection against water damage.
Practical Considerations for Smart Faucets
While the possibilities of smart faucets are exciting, there are practical considerations to keep in mind:
- Installation and Maintenance: Smart faucets often require more complex installation and specialized maintenance. Professional installation is recommended for those unfamiliar with plumbing and electrical work.
- Power Source: Some models are battery-powered, while others connect directly to your home’s electrical system. Consider the power requirements and your bathroom’s electrical setup.
- Compatibility: Ensure compatibility with your existing plumbing and smart home system, as not all smart faucets integrate seamlessly with every platform.
The Future of Smart Faucets: What to Expect
Smart faucet technology is constantly advancing. Expect to see even more advanced features in the near future, such as advanced water filtration, personalized user profiles, and seamless integration with other smart home devices. While a smart faucet may not be the right choice for everyone right now, understanding these developments will help you choose the perfect faucet today and prepare for the future of bathroom technology.
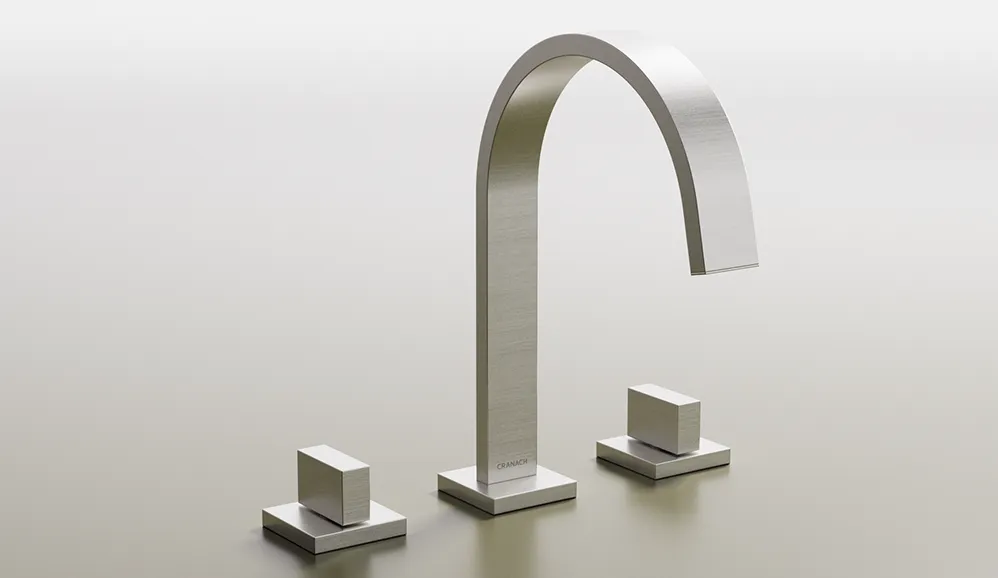
Ready to explore innovative and stylish faucets? Upgrade your bathroom with Cranach bath and kitchen products. Discover our collection of premium faucets and create a bathroom that combines modern design and exceptional functionality.