


Nothing is more frustrating than finishing a new shower head installation, turning on the water, and seeing a persistent drip. You just bought it—it should be perfect, right? The good news is that this is a super common issue, and the fix is almost always simple.
When a new shower head leaks right after you put it in, it’s rarely a problem with the fixture itself. Instead, the leak usually comes from a bad seal where the shower head connects to the shower arm. This often boils down to a few easy-to-miss details during installation.
Why Your New Shower Head Is Leaking
Think of it like screwing the lid on a jar. If you put it on crooked or the little paper seal inside is bunched up, it’s going to leak. Your shower head works the same way; it needs a perfectly tight, waterproof seal to do its job. Even a brand-new, high-quality fixture will drip if that connection isn’t just right.
This happens more often than you’d think. One analysis of product feedback found that nearly one in eight people who buy a new shower head run into leaks. The study pointed out that 12.8% of negative comments were about leaking valves, and another 15.2% mentioned installation problems as the main issue. It’s a widespread challenge, but one you can definitely solve.
Common Causes for Immediate Leaks
Before you grab your wrench, let’s pinpoint what might be going wrong. The leak almost always comes back to one of these three things:
- Not Enough Plumber’s Tape: That thin white tape is essential. It fills the tiny gaps in the threads of the shower arm to create a watertight seal. If you don’t use enough, or you wrap it in the wrong direction (it should be clockwise!), water can easily find a way out.
- A Faulty or Misaligned Washer: Inside the connector of your new shower head, there’s a small rubber washer. If this little guy is missing, cracked, or not sitting perfectly flat, it can’t form a proper seal against the shower arm.
- Improper Tightening: There’s a sweet spot here. Too loose, and it will obviously leak. But tightening it with all your might can crack the plastic connector or damage the washer, which also causes a leak.
For a connection to be truly leak-free, every part has to work together: the tape, the washer, and just the right amount of tightness. It’s why brands like CRANACH put so much focus on using high-quality components—to make getting a perfect seal on the first try as simple as possible. For a more detailed guide, check out our post on why your shower head is leaking.
To help you figure it out even faster, here’s a quick cheat sheet. Just find where the leak is coming from to identify the most likely culprit.
Quick Leak Diagnosis Cheat Sheet
Use this table to quickly match the type of leak you see with its most likely cause.
| Leak Location | Potential Cause | Quick Check |
|---|---|---|
| Drip from the connection nut | Improper tightening or bad seal | Is the connection snug? Did you use enough plumber’s tape? |
| Drip from the shower face | Clogged nozzles or internal defect | Check for mineral buildup. If brand new, it may be a rare defect. |
| Spraying from the swivel ball | Worn or damaged O-ring/seal | The O-ring inside the pivot ball may need to be replaced or reseated. |
| Constant dripping when off | Leaky shower valve in the wall | If it drips 24/7, the problem is likely your valve, not the head. |
Once you’ve matched your leak to a potential cause, you’ll be well on your way to fixing it and finally enjoying your new, drip-free shower.
Mastering the Perfect Seal to Stop Leaks
Let’s be honest, few things are more frustrating than installing a brand-new shower head, only to be met with a persistent drip… drip… drip. The good news? The fix is almost always about mastering the installation, not about needing complex plumbing skills. It really just comes down to creating a perfect, watertight seal.
Think of it like putting the lid on a jar of jam. You have that rubber seal inside the lid, and it needs to sit perfectly flat to keep things fresh. It’s the same idea with your shower head. The rubber washer inside the connector has to be seated just right. If it’s crooked or gets pinched, it leaves a tiny escape route for water to sneak through, causing that annoying leak.
The Right Way to Use Plumber’s Tape
Your best friend in this fight is plumber’s tape. But how you put it on is what separates a dry connection from a drippy one. Applying it wrong is one of the most common reasons a new shower head leaks.
Here’s the trick: wrap the tape clockwise around the threads of the shower arm. Why clockwise? Because when you screw the shower head on (also clockwise), the tape tightens into the threads instead of bunching up and unraveling. You don’t need to mummify the pipe; three to four full wraps are usually all it takes to create that perfect barrier.
The image below breaks down the simple steps to track down and fix these common leak points.
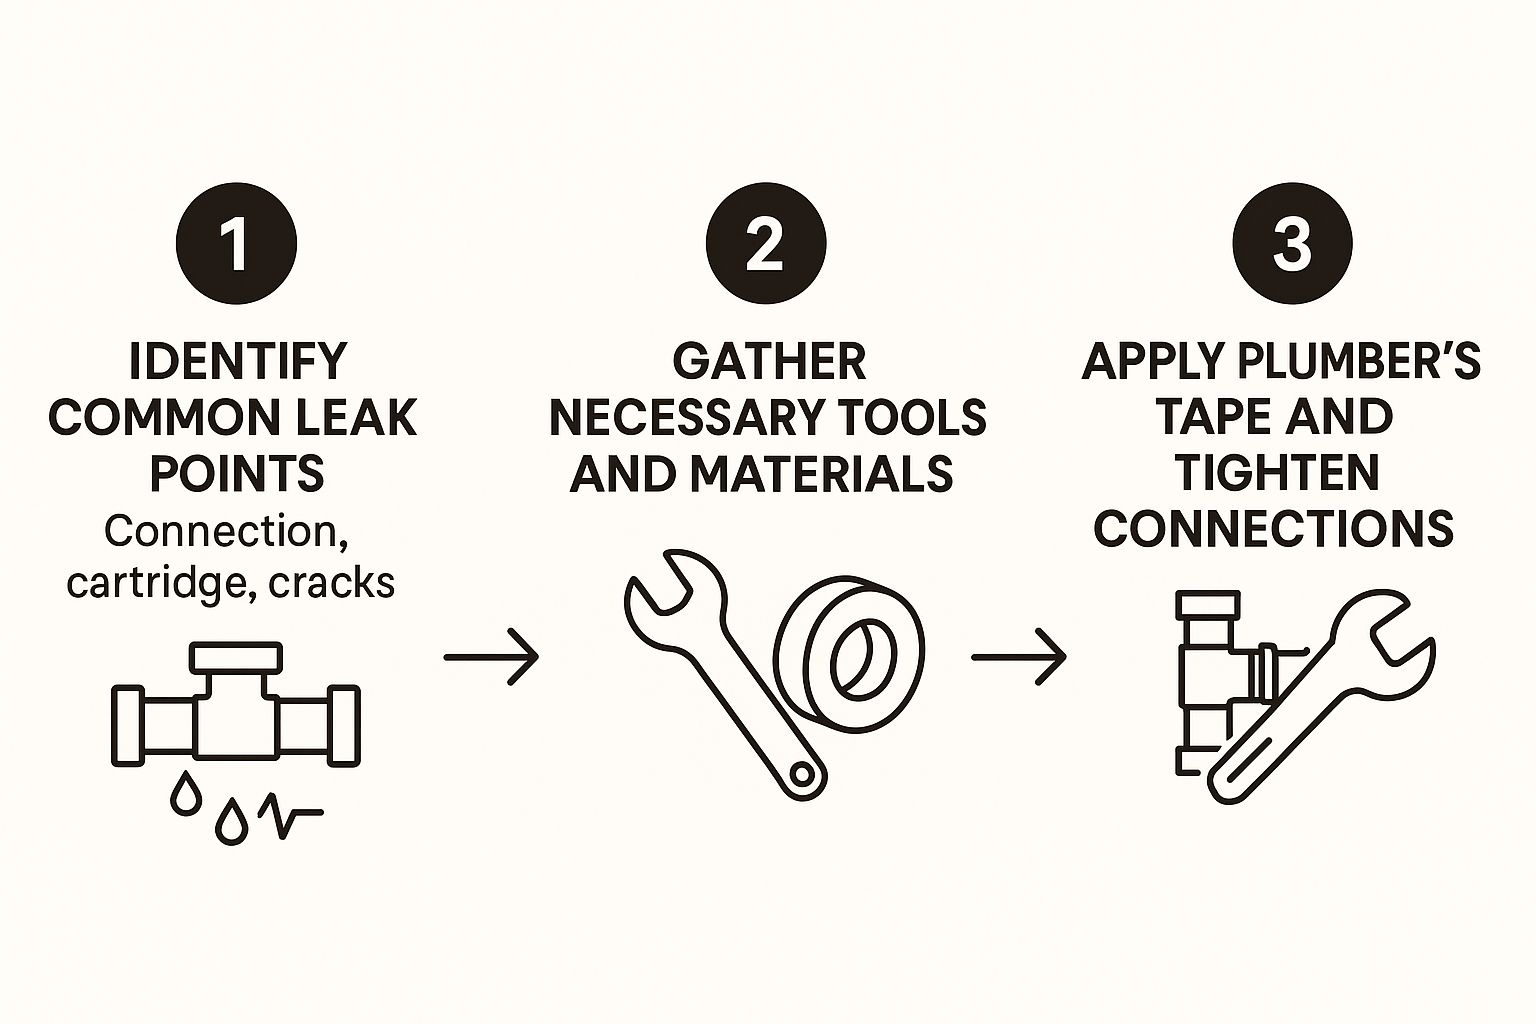
As you can see, it’s all about a methodical approach. Figure out where the water is coming from, grab your tools, and make sure you’re applying everything correctly.
The Art of Proper Tightening
With the tape in place, it’s time to tighten things up. The goal here is a snug fit, not a death grip. It’s surprisingly easy to over-tighten and accidentally crack the plastic connector or completely flatten the rubber washer, which—you guessed it—creates a whole new leak.
The rule of thumb we swear by is “hand-tight plus a quarter turn” with a wrench. Screw the shower head on by hand until it feels firm and you can’t turn it anymore. Then, grab a wrench and give it one last, gentle quarter-turn. That’s just enough pressure to compress the washer for a perfect seal without causing any damage.
Of course, long-term prevention is just as important. Mineral buildup can cause drips over time, so keeping your fixture clean is key. For some great tips, check out our guide on how to clean your shower head with vinegar. At CRANACH, we design our products with high-quality seals and super clear instructions, making it easy to get that perfect, leak-free connection right from the start.
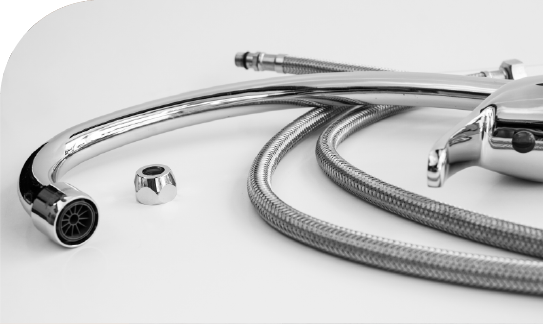
Inspecting the Small Parts That Cause Big Leaks
It’s frustrating when a brand-new fixture leaks, but more often than not, the problem isn’t the entire unit. The real culprit is usually a tiny component that was damaged, defective from the factory, or just isn’t sitting right. Before you get too frustrated, it’s worth taking a closer look at the small parts responsible for creating that watertight seal.
The usual suspects are the rubber washers and O-rings. These humble little parts play a massive role, compressing to block any path for water to escape. But even a tiny, barely-visible nick, crease, or deformity can give water just enough of a channel to push through, leading to that maddening drip.
Identifying Cross-Threading and Material Flaws
Another all-too-common issue is cross-threading. This happens when you accidentally screw the shower head on at a slight angle instead of perfectly straight. It might feel tight, but it won’t ever create a proper seal.
Think of it like putting the cap on a water bottle crooked. No matter how much muscle you put into tightening it, it’s going to leak until you back it off and line it up correctly. If you feel a lot of resistance right away when you’re screwing it on, stop. Unscrew it, take a breath, and try again, making sure the threads are perfectly aligned.
The quality of the materials themselves is also a huge factor. A durable, flexible silicone washer is always going to create a better, longer-lasting seal than a cheap, flimsy plastic one that can crack or warp under pressure.
It’s a surprising statistic, but product durability studies show that up to 20% of new shower heads can start leaking within the first few months. The reason? Often, it comes down to degraded or faulty internal seals. This really highlights just how critical these small, often-overlooked components are.
This is exactly why a premium brand like CRANACH is so focused on high-grade components. We use superior materials for every single washer, O-ring, and fitting, designing our shower systems to prevent these common leaks from ever becoming a problem in the first place.
If you’ve checked the shower head and find the leak is actually coming from the faucet handle, we’ve got you covered there, too. You might want to check out our guide on how to fix a leaky shower faucet.
How Your Home’s Water Pressure Causes Drips
Sometimes, the culprit behind a leaky new shower head has nothing to do with the fixture itself. The real problem might be hiding deeper within your home’s plumbing system—specifically, your water pressure. Think of your pipes as arteries; the water pressure is the force pushing water through them.
When that pressure is too high, it puts constant, excessive force on every seal and washer in your brand-new shower head. It’s a lot like over-inflating a tire. Eventually, the intense pressure finds the weakest point and creates a way out. This force can push even brand-new components past their limits, causing a leak.
On the flip side, very low pressure can also be the source of those annoying post-shower drips. If the pressure isn’t strong enough to push all the water out, some of it will pool inside the shower head, slowly trickling out long after you’ve shut the water off.
Is Your Water Pressure the Problem?
So, how can you tell if your home’s water pressure is out of whack? It’s not just about the shower. Keep an eye (and an ear) out for these common signs around the house:
- Sputtering Faucets: When you turn on other taps, does the water spit and sputter before finally flowing smoothly?
- Banging Pipes: Ever hear loud knocking or banging sounds coming from your walls when water is running? That’s called a “water hammer,” and it’s a classic sign of high pressure.
- Inconsistent Flow: Does the stream from your faucets seem to randomly switch between weak and strong?
Research shows that inconsistent water pressure is a major player in new fixture leaks, accounting for an estimated 15-20% of problems in newer installations. Residential pressure can swing wildly from a low of 20 psi to over 80 psi, and not every shower head is built to handle those extremes.
If these symptoms sound familiar, it’s probably time to call in a professional to test your pressure. A plumber can tell you if a pressure-reducing valve is needed to protect your fixtures—including your high-quality CRANACH system.
And if you discover your problem is actually low pressure, don’t worry. You can check out our guide on how to increase water pressure in your shower for some easy fixes.
Choosing a Shower Head Designed to Be Leak-Proof
Fixing a leak is one thing, but preventing it from ever happening in the first place is the real win. The best way to sidestep the frustration of a brand-new, dripping shower head is to pick a fixture that’s engineered to be leak-proof right from the start. The secret here isn’t magic—it’s just a smart combination of superior materials and a design that’s actually user-friendly.
When you’re weighing your options, get a feel for the construction. A shower head built with precision-machined brass fittings will always outperform one made with flimsy plastic parts. It’s just a fact. Brass is far less likely to crack when you tighten it, and its threads create a much more reliable, watertight seal.
Built-in Reliability
Another detail that makes a world of difference is the quality of the internal seals. High-grade silicone washers and O-rings are simply more resilient than their cheaper rubber or plastic cousins. They won’t dry out, crack, or lose their shape under constant water pressure, which means they hold up for a longer, leak-free life.
By focusing on robust materials and engineering for a simple, intuitive installation, you can address the most common leak points before they ever become a problem.
This is the exact philosophy brands like CRANACH build their shower systems around. We make it a priority to use top-tier materials like brass fittings and premium silicone seals. When you’re shopping, remember that a shower head is just one piece of a whole system of quality bathroom fittings where durability is key. Choosing a well-engineered product isn’t just a purchase; it’s an investment in a reliable, drip-free experience right out of the box.
Still Have Questions? Let’s Clear Things Up
Even with the best guide, sometimes you just have that one little question nagging at you. Let’s tackle some of the most common things people ask when they’re dealing with a brand-new, but leaky, shower head. We’ll get you to that final fix so you can shower in peace.
“My New Shower Head Only Leaks When the Water Is On. What Does That Mean?”
Ah, this is a classic. It’s the perfect sign of a pressure-related leak right at the connection point. When the water’s off, everything seems fine. But the moment you turn on the shower, the water pressure is just enough to force its way through a tiny, invisible gap in the seal.
Nine times out of ten, the culprit is one of three things:
- The plumber’s tape wasn’t applied correctly, is too thin, or was forgotten entirely.
- The little rubber washer inside the connector is old, pinched, or not sitting perfectly flat.
- The shower head itself just isn’t screwed on quite tight enough.
Your first move should always be to re-tape the threads and double-check that washer. Make sure it’s in pristine condition and sitting flush before you tighten everything back up. This simple fix solves the problem for more than 90% of people.
“Can I Use Something Besides Plumber’s Tape?”
It’s tempting to reach for whatever’s in the junk drawer, but for this job, you really need to stick with the right stuff. Plumber’s tape (also called Teflon tape) is the go-to for a reason. It’s made specifically for these threaded pipe joints, it’s clean, and it works like a charm for DIY jobs.
Critical Tip: Don’t even think about using substitutes like duct tape, electrical tape, or that tube of silicone caulk from your last project. These materials aren’t designed to handle constant water pressure and will turn into a sticky, hardened nightmare the next time you need to remove the shower head.
Some pros use a liquid pipe sealant, but it’s overkill and can get incredibly messy for a simple shower head swap. Stick with the tape.
“I’ve Tried Everything and It Still Leaks. What Now?”
Okay, take a deep breath. If you’ve meticulously re-taped the threads, confirmed the washer is seated like a champ, and you’re positive you didn’t cross-thread the connection, it’s time to look a little deeper. Start by taking a close look at the shower arm—the pipe coming out of the wall. Are there any hairline cracks or damaged threads you might have missed?
If the arm looks good, there’s a small chance you’ve run into a rare manufacturing defect in the shower head itself. This is where a good brand really shows its worth. A quality company like CRANACH has a dedicated support team that’s ready to walk you through troubleshooting or send out a replacement part, no questions asked.
For a truly therapeutic and healthy shower experience free from frustrating drips, explore the leak-proof engineering of CRANACH shower systems. Upgrade your bathroom today.