Pinpointing the Problem Behind Your Leaking Shower Head
A leaking shower head is an incredibly common issue, one that most homeowners will face at some point. It might seem small, but those drips add up. In fact, plumbing industry surveys show that minor drips can account for about 9% of all household water use. A single shower head dripping just 10 times per minute can waste over 1,000 liters of water in a year. Ouch.
Figuring out the specific cause is the first step toward a real, lasting fix. If you’re curious about the bigger picture, you can learn more about the impact of household leaks from this global market research on water-saving shower heads.
Common Causes of a Leaky Shower
Think of your shower as a simple system. When one little part fails, leaks are often the first sign of trouble. Let’s break down the most frequent culprits.
- Worn-Out Washer or O-Ring: This is the usual suspect. There’s a small rubber or silicone seal that sits right where the shower head connects to the shower arm. Over time, it gets old, cracks, or gets compressed, which breaks the watertight seal.
- Mineral Buildup (Limescale): If you have hard water, you know the drill. It leaves behind mineral deposits that clog up the tiny nozzles on your shower head. This blockage creates back pressure, forcing water to find another way out—usually through weaker points like the connection threads.
- Loose Connections: Sometimes, the fix is refreshingly easy. The connection where the shower head screws onto the shower arm can simply work itself loose over time. A quick tighten is all it needs.
To make diagnosing your leak even easier, we’ve put together a quick guide. Use this table to match what you’re seeing with its most probable cause. This will help you identify the right solution and get started on the fix.
Common Leak Symptoms and Their Likely Causes
| Symptom | Most Likely Cause | Typical Fix Difficulty |
|---|---|---|
| Water dripping from the connection point (where the head meets the arm) | Worn-out washer or loose connection | Easy |
| Water spraying erratically or leaking from the face of the head | Clogged nozzles due to mineral buildup | Easy to Moderate |
| A steady drip from the nozzles even when the water is off | The internal valve of the shower handle is failing, not the shower head itself | Moderate to Difficult |
| The shower head itself has a visible crack or damage | The shower head is broken and needs replacement | Easy |
Hopefully, that table points you in the right direction for a quick DIY repair.
In some cases, an old or damaged shower head may just be at the end of its life. If you’ve tried the simple fixes and the drip persists, it might be time to consider an upgrade. A modern CRANACH shower system can be a great solution. They’re designed with durable materials and advanced anti-leak technology to prevent these common issues from happening in the first place.
Your Step-by-Step Guide to Diagnosing the Drip
Start by just watching the leak. Is it a constant, maddening drip that continues long after you’ve turned the shower off? Or does it only leak while the water is actually running? This is a critical distinction—a constant drip almost always points to a problem with the main faucet valve, not the shower head itself. If that’s what you’re seeing, our guide on how to fix a leaky shower faucet is what you’ll need.
Next, get a good look at the leak’s origin. It’s almost always coming from one of three places:
- The Shower Head Face: If water is dripping or spraying weirdly from the nozzles, you’re likely dealing with a clog caused by mineral buildup.
- The Connection Point: A leak where the shower head meets the pipe coming from the wall (the shower arm) usually means you have a bad washer or simply a loose connection.
- The Shower Arm Base: See water seeping out from where the shower arm goes into the wall? That’s a bigger issue, likely with the pipe fitting hidden inside the wall itself.
This simple diagnostic process sets you on the right path, from seeing the leak to grabbing the right tools.
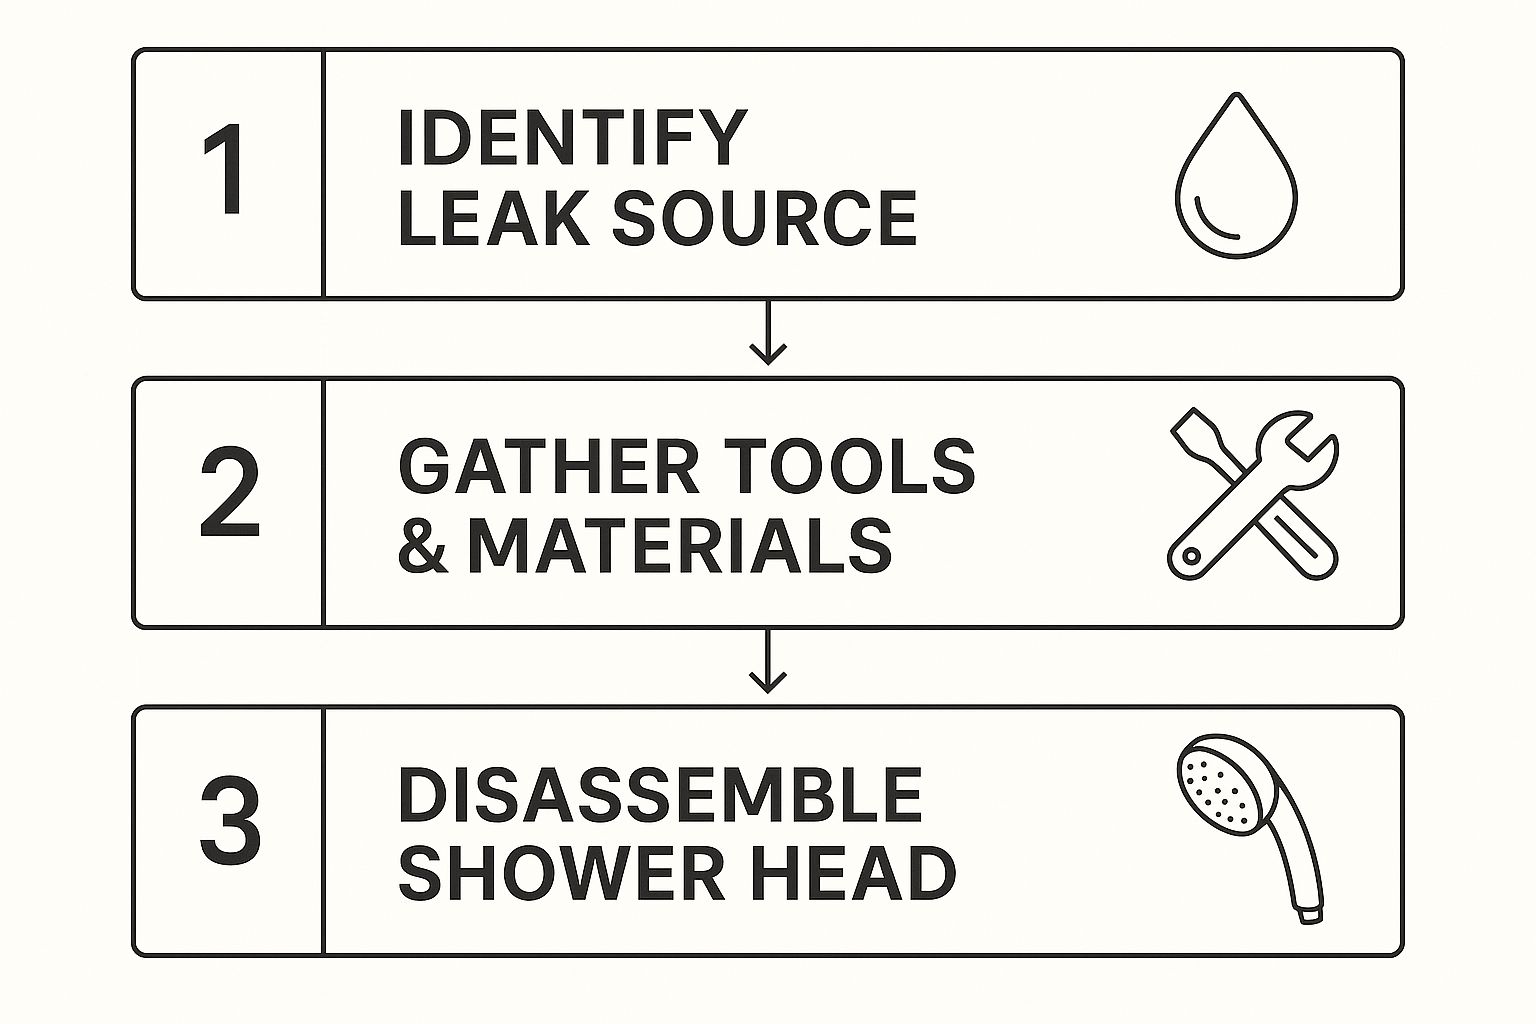
Following these logical steps ensures you’re tackling the real problem instead of chasing a fix for the wrong part.
How to Replace a Worn-Out Washer or Seal
If you’ve traced the leak back to where your shower head meets the shower arm, you’ve pinpointed the single most common culprit. The unsung hero of this connection is a small, humble rubber piece—the washer or O-ring. Think of it as a tiny gasket whose only job is to create a perfect, watertight seal.
Over time, this little seal takes a beating from constant pressure and temperature shifts. It can get brittle, crack, or become too squashed down to do its job anymore. When that happens, water finds a way to sneak through the threads. The good news? This is one of the easiest and cheapest DIY plumbing fixes you can tackle.
Your Quick Replacement Guide
Swapping out a tired washer is a straightforward job that won’t take more than 15 minutes and a few basic tools.
Tools You’ll Need:
- An adjustable wrench or channel-lock pliers
- A soft cloth or rag (to protect the finish)
- A new replacement washer or O-ring
- Plumber’s tape (optional, but a good idea)
First things first, shut off the water supply to the shower. You don’t want any surprises. If you notice any crusty mineral buildup on the shower head, this is the perfect time to give it a good clean. For an easy and effective method, check out our guide on how to clean your shower head with vinegar.
Pro Tip: When you’re ready to remove the shower head, wrap your soft cloth around the connection nut before you put the wrench on it. This simple step is a lifesaver—it stops the tool from scratching or gouging the chrome or brushed nickel finish, keeping your fixtures looking brand new.
With the shower head off, just use a small flathead screwdriver (or even your fingernail) to pry out the old, worn washer. Pop the new one in, making sure it sits flat and snug inside the connection.
Finally, screw the shower head back on. Start by hand-tightening it, then give it a gentle quarter-turn with the wrench to lock in that new seal. That’s it. This simple fix almost always puts an end to the drip for good.
Clearing Out Mineral Buildup and Clogged Nozzles
If you happen to live in an area with hard water, you’re probably all too familiar with what it can do. Your pipes are constantly dealing with dissolved minerals like calcium and magnesium. Over time, these minerals love to set up shop inside your shower head, creating a crusty, stubborn residue we call limescale. This is one of the most common culprits behind a leaky shower head.
It’s a bit like a clogged artery in your home’s plumbing. As the tiny spray nozzles get blocked, water pressure builds up with nowhere to go. That trapped water has to escape somehow, so it forces its way out through the weakest points—usually the connection threads—causing that annoying drip you just can’t ignore.
A Simple Descaling Process
The great news is you don’t need to call in the pros or use harsh chemicals for this one. You can easily dissolve all that mineral buildup with a simple, yet highly effective, vinegar soak.
- Remove the Shower Head: First things first, carefully unscrew the shower head from the shower arm. Pro tip: wrap a soft cloth around the connection nut before you use your wrench. This will protect the finish from getting scratched.
- Soak in Vinegar: Find a bowl or a plastic bag big enough to fully submerge the shower head, and fill it with plain white vinegar. Let it soak for at least a few hours. For really stubborn buildup, leaving it overnight is your best bet.
- Scrub and Rinse: Once the soak is done, grab an old toothbrush and gently scrub away any leftover gunk from the nozzles and the surface. Give it a good, thorough rinse with warm water to flush out all the loose debris and vinegar.
Clogged nozzles don’t just cause leaks—they also kill your shower’s performance, leading to weak or erratic spray patterns. Clearing this buildup is a two-for-one fix that both stops the leak and restores your water flow.
This little bit of maintenance not only solves a common leak but also makes your daily shower a whole lot better. If you’re looking for more ways to get the most out of your shower, you might want to check out our guide on how to increase water pressure in your shower.
Should I Repair My Old Shower Head or Just Buy a New One?
Honestly, this just comes down to a simple cost-benefit analysis. For straightforward problems like a worn-out washer or some limescale you can clean off, a DIY repair is the smart move. These fixes usually cost just a few bucks and take less than an hour of your time.
But if your shower head has a visible crack, is heavily corroded, or you’ve tried the basic fixes and it still leaks, replacement is the more sensible, long-term solution.
Upgrading to a modern CRANACH shower system gives you so much more than just a leak-free experience. You get better water efficiency, a far superior spray, and high-quality materials built to prevent the very leaks that plague older models. A new system can save you water, money, and the headache of future repairs.
At CRANACH, we believe a great shower can truly transform your day. Explore our collection of premium shower systems and discover the difference that quality engineering makes.

