
That old, grimy shower handle does more than just look bad—it can make your whole bathroom feel stuck in the past. Learning how to change shower handle is a perfect weekend project that packs a big punch. Really, it just boils down to a few straightforward steps: shut off the water, find and remove the set screw, pop the old handle off, and put the new one on. It’s a simple swap that can completely upgrade how you start your day.
A Fresh Look for Your Shower Is Easier Than You Think
Figuring out how to change shower handle is one of the most rewarding and accessible DIY upgrades you can tackle. This isn’t a massive plumbing job. It’s a small change that makes a huge difference in your bathroom’s style and vibe, which is why it’s such a go-to for homeowners.
Bathroom updates are more popular than ever. In fact, about half of all homeowners have recently taken on some kind of renovation, with outdated fixtures like shower handles being a prime target. The process is almost always the same: loosen a small set screw, pull the handle off the valve stem, and then secure a new, compatible one in its place. You can find more insights on home renovation trends over at GMI.
Think Bigger Than Just the Handle
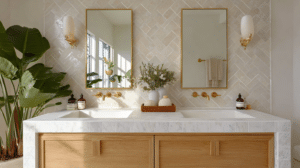
While swapping out a single handle is a great quick fix, why not use this as a chance to think about a more complete update? Creating a cohesive design can really elevate your entire bathroom.
- Handle-Only Replacement: This is your fastest, most budget-friendly option for fixing a broken or just plain ugly handle.
- Full Shower Set Upgrade: If you’re aiming for a total aesthetic refresh, a full shower set is the way to go. Getting a matching handle, spout, and showerhead creates that unified, high-end look you see in design magazines.
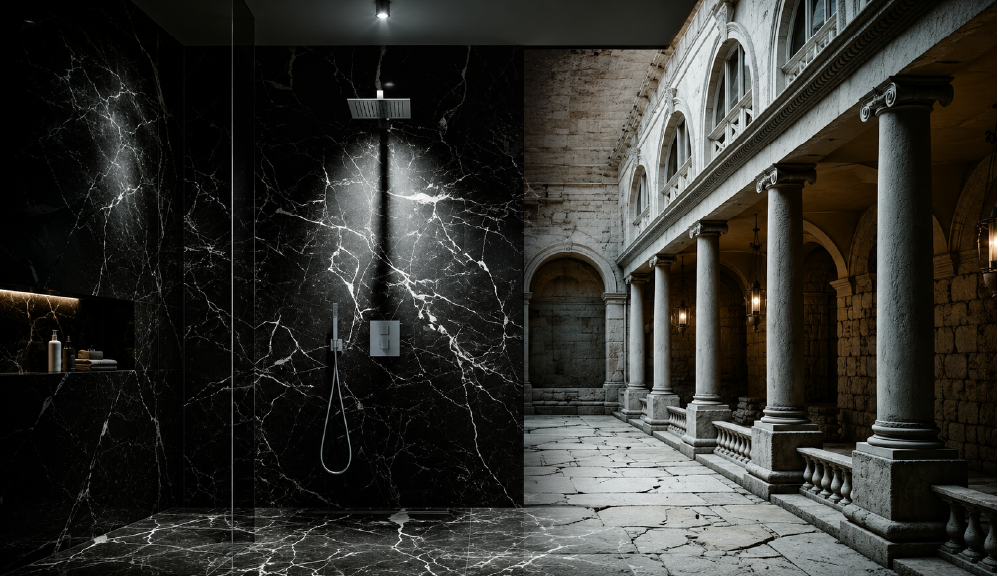
For anyone wanting to build a true spa-like retreat at home, upgrading to a complete shower set from a brand like CRANACH delivers on both looks and better function. You can check out all kinds of modern styles in the CRANACH shower system collection.
Gathering Your Tools for a Flawless Job
Nothing kills the momentum of a DIY project faster than realizing you’re missing the right tool midway through. Before you even think about how to tackle the shower handle replacement, let’s get your toolkit sorted. Trust me, spending a few minutes now to gather everything you need will save you a world of frustration later.
Most shower handles are held in place by a tiny set screw, often cleverly hidden beneath a decorative cap on the handle’s base. Your main challenge is getting to that screw. For this, you’ll likely need a set of Allen wrenches (also known as hex keys) or a standard Phillips head screwdriver. A small, flathead screwdriver also comes in handy for gently popping off that cap without leaving a scratch.
Here’s a quick checklist of the tools that will make this job a breeze. Think of this as your recipe for a successful, scratch-free installation.
| Tool Name | Primary Use | Pro Tip |
|---|---|---|
| Screwdriver Set | Removing faceplate screws and some handle set screws. | A multi-bit screwdriver is a great all-in-one option. |
| Allen Wrench Set | Loosening the hidden set screws on most modern handles. | Keep both metric and imperial sets handy; you never know what you’ll find. |
| Pliers | Providing extra grip on stubborn components. | Wrap the jaws with electrical tape or a rag to protect the fixture’s finish. |
| Soft Rags/Towel | Protecting the shower base and cleaning surfaces. | Also useful for wiping away mineral buildup once the old handle is off. |
| Flashlight | Identifying the type of screw inside the handle. | A phone flashlight works perfectly for this. |
With these tools lined up, you’ve set the stage for a smooth and successful project. Now, you’re ready to move on to the main event.
Pro Tip: Before you stick any tool in there, shine a flashlight into the screw hole. Figuring out whether it’s a Phillips, flathead, or hex screw before you start turning can prevent a stripped screw—and save you from a massive headache.
Taking Off the Old Shower Handle
Alright, with your tools laid out, it’s time to learn how to change shower handle the right way. Before you even think about touching a screw, the first and most critical step is to shut off the water. This isn’t optional—skipping this will give you a very wet, high-pressure surprise. Find your home’s main water shut-off valve, usually tucked away in a basement or utility closet, and give it a clockwise turn until it’s completely closed.
With the water off, pop back to the shower and turn the faucet on. This will drain any water still hanging out in the pipes, confirming the supply is cut and preventing any annoying drips while you’re working.
Finding and Removing the Set Screw
Most shower handles have a small decorative cap or a cover plate at the base. You’ll need to gently pry this off using a small, flathead screwdriver. My advice? Be patient and work your way around the edge to avoid scratching up the finish.
Once that’s off, you’ll see the set screw that’s holding the handle to the valve stem. Use your flashlight to get a good look at it—is it a Phillips head or an Allen (hex) screw? Grab the right tool and turn the screw counter-clockwise. You usually only need to loosen it enough for the handle to slide off; you don’t have to take the screw all the way out.
Here’s a look at that key moment where you’re loosening the hardware to free the handle.
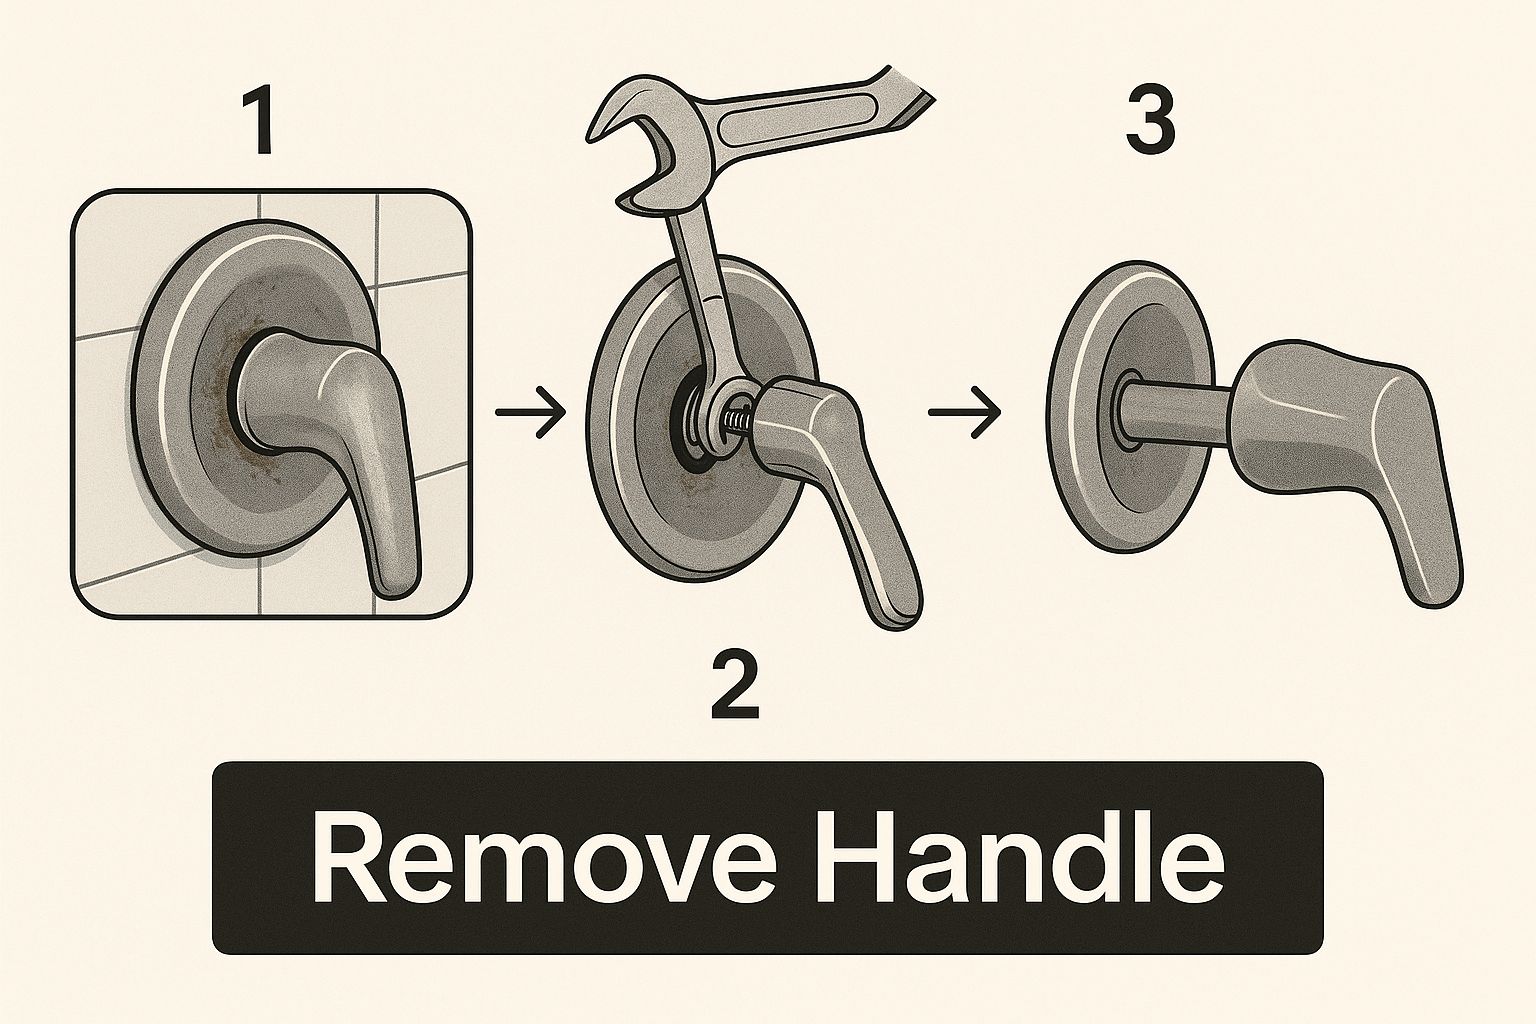
This visual really zeroes in on disengaging the handle from the valve stem, which is the heart of the whole removal process.
Dealing With a Stuck Handle
After years of use, mineral buildup can make that handle feel like it’s been welded on. If a gentle wiggle doesn’t do the trick, don’t try to force it. Yanking on it can cause some serious damage to the plumbing hidden inside your wall.
A much safer approach is to use something that can dissolve those mineral deposits. A cloth soaked in plain white vinegar, wrapped around the base of the handle for about an hour, often works wonders. It helps break down all that stubborn calcium and lime.
If it still won’t budge, you might need a special tool called a handle puller. They’re inexpensive and designed to apply even pressure, popping the handle off without damaging the valve.
It’s also worth remembering that the handle connects to the shower cartridge, which is the internal part that controls your water flow and temperature. If you run into problems that seem to go deeper than just the handle, you can learn more by checking out our guide on how to remove a shower cartridge.
With the old handle finally off, you’re ready for the satisfying part: putting the new one on.
Installing Your New Handle for a Perfect Finish
With the old, stubborn handle out of the way, you’re on to the rewarding part. Installing the new handle is where the upgrade really comes to life, but it’s the small details that make for a professional, lasting finish. This is your chance to make a real impact on your bathroom’s look and feel.
Before you slide on the new hardware, take a quick second to clean the exposed valve stem and the area around it. Years of moisture can lead to grime and mineral buildup that was impossible to reach before. A simple wipe-down ensures the new handle sits flush and operates smoothly right from day one.
Aligning and Securing Your New Handle
Getting the alignment right is crucial. Slide the new handle onto the valve stem, pushing it on as far as it will go. Now, eyeball its orientation—does it point down for “off” and rotate correctly toward the hot and cold markers on the trim plate? Go ahead and adjust it until it looks perfect.
Once you’re happy with how it’s sitting, it’s time to tighten that set screw. You’re aiming for snug and secure, but you absolutely want to avoid over-tightening.
Pro Tip: Tighten the screw just until you feel solid resistance, then give it one final, tiny nudge. Cranking down on it too hard can strip the screw or, even worse, damage the valve stem, turning this simple job into a major headache. A gently secured handle will be perfectly stable for daily use.
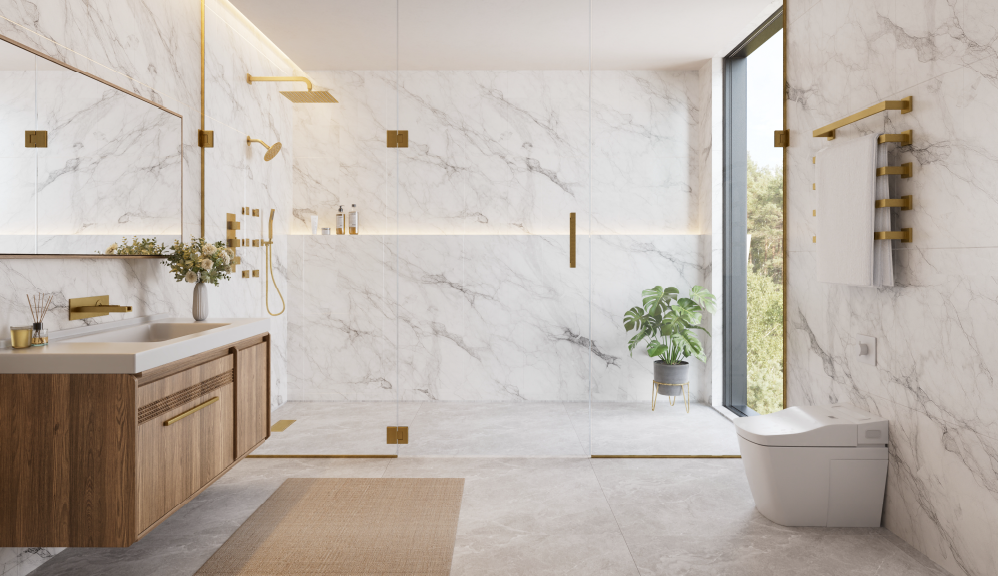
Elevate Your Space with a Full Shower Set
Knowing how to change shower handle is a fantastic skill, but this project is the perfect excuse to think bigger. A new handle is a nice touch, but a complete, matching shower set can completely transform your bathroom from merely functional to genuinely luxurious. It’s a popular upgrade, and for good reason.
The global market for shower components is booming, projected to hit USD 21.4 billion by 2035. This growth is driven by homeowners just like you who are looking for smarter, more efficient, and stylish bathroom fixtures. You can dive deeper into these industry trends over at Spherical Insights.
Upgrading to a full system from a brand like CRANACH guarantees that every piece works together flawlessly.
Troubleshooting Common Replacement Issues
Even a project that seems straightforward can hit a snag. Knowing how to change shower handle also means knowing how to get yourself out of a jam. Think of this as your DIY safety net for when things don’t go exactly as planned.
One of the most common headaches is a stripped set screw. We’ve all been there. You put the Allen wrench in, give it a turn, and… nothing. It just spins. If that happens, stop right there before you make it worse. A simple screw extractor kit is a lifesaver for this exact problem. It’s an inexpensive tool that will let you grip that damaged screw and back it out without a fight.
Fixing Handle Fit and Stability
Another frequent issue is a wobbly new handle. You tighten the set screw, but it still feels loose. Frustrating, right? Take the handle back off and have a good look at the valve stem. Most of the time, the handle just wasn’t pushed on all the way, or the screw isn’t perfectly lined up with the flat side of the stem. A tiny adjustment is often all you need for a rock-solid fit.
Sometimes, the new handle won’t even slide onto the old valve stem. This is a classic compatibility problem, and it’s precisely why matching the handle to your faucet’s brand and model is so important.
A new handle might feel like a simple swap, but manufacturers often have unique valve designs. If you’re unsure, taking a picture of your valve stem to the hardware store can save you a return trip and a lot of frustration.
Got Questions About Your Shower Handle Project?
It’s totally normal to have a few questions before you dive into a project like this. After all, nobody wants a surprise shower from an open pipe. Let’s tackle some of the most common things people ask when they’re swapping out a shower handle.
Are Shower Handles Universal?
Nope, definitely not. This is probably the #1 mistake people make. Shower handles are designed to fit specific shower valves—that’s the plumbing part hidden inside your wall. Think of it like a key for a lock; it has to be the right shape and size to work.
Before you even think about buying a replacement, you need to know the brand of your current faucet or trim kit. This will save you a frustrating trip back to the hardware store.
Key Takeaway: Your phone is your best tool here. Snap a quick, clear picture of the valve stem once the old handle is off. You can use that photo to match it up at the store or compare it to online product images. It’s the surest way to get a perfect fit.
How Can I Tell What Kind of Shower Valve I Have?
Start by playing detective. Look closely at the handle or the decorative plate behind it (that’s called the escutcheon) for a brand name or a tiny logo. You might see names from different manufacturers on the market.
If it’s a mystery with no markings, don’t worry. Your next move is to shut off the water, pull off the handle, and take that photo of the valve stem we just talked about. You can then use online resources, like the identification guides from the Plumbing Supply Group, or just show the picture to an expert at a local plumbing supply shop. They’ve seen it all and can usually identify it in seconds.
Can I Get Away With Changing the Handle Without Shutting Off the Water?
Please don’t. You should always turn off the main water supply to the shower before you start unscrewing anything. It’s so easy to accidentally bump or turn that valve stem while you’re working. One wrong move could send a powerful, uncontrolled spray of water all over your bathroom.
Trust me, the few extra seconds it takes to shut off the water is well worth avoiding a potential flood and water damage. It’s a non-negotiable safety step.
While you’re working on the handle, it’s also a good time to think about the rest of your fixtures. Hard water and mineral buildup can make parts stick and look grimy. If your shower head is looking a little clogged, check out our guide on how to clean a shower head with vinegar.
Ready to upgrade more than just the handle? If you want to create a cohesive, spa-like feel, explore the full range of stylish and high-quality shower set options from CRANACH.
Browse our complete shower system collection and find the perfect upgrade for your home.