

The secret to stopping mold in your shower isn’t complicated. It really comes down to two things: controlling moisture and getting rid of its food source.
If you can keep the area dry with good ventilation and consistently clean away the soap scum and grime mold loves to eat, you’ve won half the battle. Master these two habits, and you’ll stop mold before it ever gets a foothold.
Understanding Why Your Shower Is a Mold Magnet
Before you can win the fight, you have to know your enemy. Mold isn’t just an ugly stain; it’s a living thing that absolutely thrives in the exact conditions your shower creates every single day.
Think of it like this: your shower is basically a five-star resort for mold, offering all its favorite amenities.
Every time you turn on the hot water, you’re creating a warm, steamy environment—that’s ingredient number one. The constant spray and lingering humidity provide the second piece of the puzzle: moisture. Finally, all that leftover soap scum, body oils, and skin cells serve as an endless buffet. Put them all together, and you’ve got the perfect breeding ground.
The Problem with Grout and Caulk
Unfortunately, the very materials your shower is built with often make things worse. Grout lines and caulk are porous, meaning they act like tiny sponges that soak up and hold onto water long after you’ve shut off the tap. This constant state of dampness makes them prime real estate for mold spores to settle in and start a family.
According to the U.S. Environmental Protection Agency (EPA), controlling moisture is the key to controlling mold indoors. This underscores just how common and preventable this bathroom battle really is.
Since mold can’t survive without moisture, getting a handle on your home’s overall humidity is a crucial first step. You might want to explore some effective humidity control strategies to protect more than just your bathroom.
Even tiny, unseen leaks can feed a growing mold problem. If you suspect a hidden drip behind the wall, our guide on how to remove a shower valve cartridge can help you tackle the issue right at the source.
Mastering Airflow to Keep Your Shower Dry
Your most powerful tool in the fight against mold isn’t a spray bottle or a sponge—it’s creating an environment where it simply can’t survive. Lingering dampness is like rolling out the welcome mat for mold spores, which is why mastering the airflow in your bathroom is a non-negotiable part of the plan.
If you adopt one single habit, make it this one: run your bathroom exhaust fan during every shower and keep it running for at least 30 minutes afterward. It seems simple, but this actively pulls all that steamy, moisture-heavy air out of the room before it has a chance to settle and condense on your walls, ceiling, and shower corners.
The whole game is about moisture control. Mold is driven by dampness, plain and simple. Official guidance from the EPA suggests keeping indoor humidity below 60%, and ideally, you want to be in the 30-50% range to really shut down any chance of mold taking hold.
Make Sure Your Fan is Actually Working
Is your fan just making noise, or is it doing its job? There’s an easy way to find out. We call it the “tissue test.”
Just turn the fan on and hold a single square of toilet paper up to the vent. If the suction holds the tissue flat against the grate, you’re in good shape. If it flutters and falls, your fan is probably clogged with dust or just isn’t powerful enough for the space. It might be time for a good cleaning or an upgrade.
And it’s not just about the bathroom fan. Your home’s entire ventilation system plays a role in managing humidity. If you want to dive deeper, this air ventilation cleaning guide is a fantastic resource.
Pro Tip: If you’re shopping for a new fan, pay attention to the CFM rating (cubic feet per minute). A higher CFM number means more air-pulling power, which is exactly what you need for bigger bathrooms or if you’re constantly battling high humidity.
No fan? That’s okay, you still have options. Crack open a window during and after your shower to create some cross-ventilation. If you’ve got a windowless bathroom, a small dehumidifier placed nearby can be a lifesaver, as it will actively pull moisture right out of the air.
Your Practical Anti-Mold Cleaning Routine
Let’s be honest: the best way to deal with shower mold is to never let it grow in the first place. This isn’t about marathon cleaning sessions with harsh chemicals. It’s about creating a simple, sustainable routine that makes your shower a terrible place for mold to live.
The goal is to cut off its food supply—soap scum and grime—and eliminate the moisture it needs to thrive. A few quick daily habits, backed up by a solid weekly scrub, are far more effective than waiting for those ugly black spots to appear and then trying to bleach them away.
Think of it as mold prevention, not just mold removal.
As you can see, the right strategy is built on consistency with basic tools. It’s simpler than you think.
Your Daily Defense Plan
The most important moment in your anti-mold strategy happens right after you turn off the water. Grab a squeegee and wipe down the shower walls, glass, and even the shower system itself. This takes less than 30 seconds but removes the bulk of the water that mold spores need to grow.
Don’t forget about your towels, loofahs, and bathmats. Damp fabrics are a paradise for mold. Make it a habit to hang them where they can get plenty of air and dry out completely. A damp towel wadded up in a corner is an open invitation for mildew.
The Weekly Reset
Once a week, it’s time to get a little deeper and remove the soap scum and body oils that have built up. This is the stuff mold feeds on. You don’t need a hazmat suit for this; a simple homemade solution works wonders.
- Mix a DIY Cleaner: Grab a spray bottle and fill it with equal parts white vinegar and water. Vinegar’s natural acidity is fantastic for cutting through soap scum and killing lingering mold spores.
- Target the Grout: Spray your tile and grout lines generously. Let the solution sit and work its magic for about 10-15 minutes.
- Scrub and Rinse: Use a stiff brush to give the grout a good scrub, then rinse everything down with warm water. You can find more tips on using vinegar effectively in our guide on how to clean shower head with vinegar.
To really keep things in check, it helps to see how these small tasks fit together.
Daily vs. Weekly Anti-Mold Shower Care
| Task | Frequency | Time Commitment | Impact on Mold Prevention |
|---|---|---|---|
| Squeegee walls & glass | Daily | < 30 seconds | High – Removes moisture |
| Air out towels & mats | Daily | 10 seconds | High – Eliminates damp habitats |
| Run exhaust fan | Daily | 0 seconds (during/after) | High – Reduces humidity |
| Spray & scrub with vinegar | Weekly | 15-20 minutes | High – Kills spores & removes food |
| Check for leaks/drips | Weekly | 1 minute | Medium – Prevents hidden moisture |
This simple schedule turns a big problem into a few manageable, almost effortless habits.
For a truly deep clean, especially if you’re dealing with stubborn grout, advanced steam cleaning methods can be a game-changer. Steam gets into porous surfaces to kill hidden spores without any chemicals at all.
By following this straightforward routine from CRANACH, you’re not just cleaning your shower—you’re actively making it a mold-free zone.
Building a Shower That Fights Mold for You
While your daily cleaning routine is a huge piece of the puzzle, the absolute best way to how to avoid mold in shower areas for the long haul is to build a space that’s hostile to it from the start. A smart foundation built with the right materials can eliminate most of the common problem spots before they ever get a chance to form.
Think about a traditional tile shower. All those hundreds of grout lines are basically a perfectly laid-out grid of mold habitats. Grout is porous, acting like a tiny sponge that soaks up and holds onto moisture. It’s no wonder that’s the first place you always see those dreaded black spots. It’s a constant, frustrating maintenance battle you can simply choose not to fight.
Ditch the Grout, Ditch the Problem
Thankfully, modern materials offer a far superior solution by drastically cutting down—or completely getting rid of—grout lines. As noted by industry experts like the National Kitchen & Bath Association (NKBA), trends are moving towards low-maintenance and hygienic surfaces. If you’re planning a remodel, these are the options you should be looking at:
- Solid-Surface Panels: These give you a totally seamless and non-porous wall. There’s literally nowhere for water to hide.
- Acrylic and Fiberglass Surrounds: Just like solid-surface options, these create a smooth, easy-to-clean surface that mold simply can’t penetrate.
One homeowner summed it up perfectly: “small tiles in the shower creates lots of grout lines and are a real pain to keep clean. Big tiles in the shower a better way to go. Reduce the grout.” It’s a common regret that really drives home why minimizing seams is the secret to a low-maintenance, mold-free shower. You can find more real-world renovation advice and what-not-to-do stories on design sites like Style by Emily Henderson.
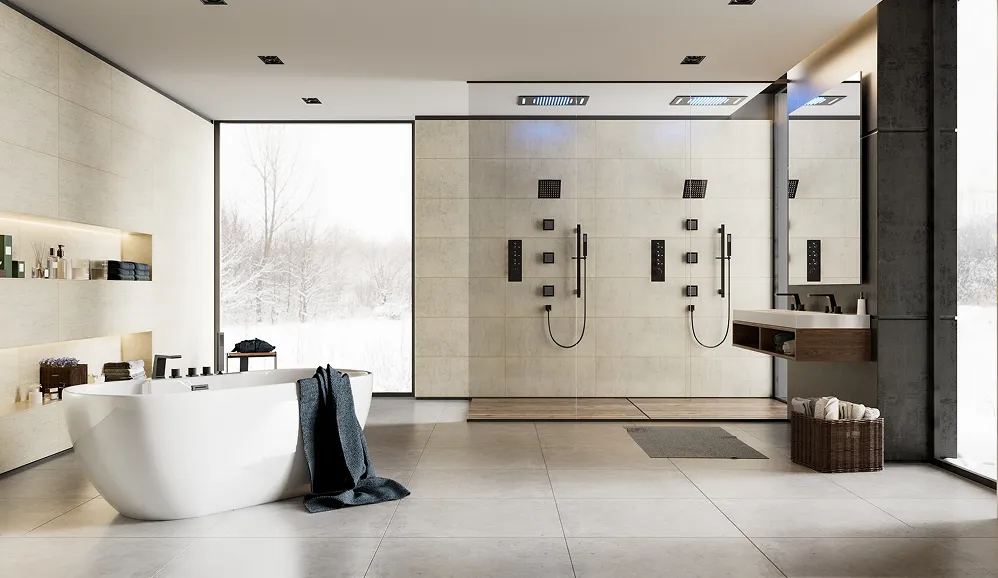
Your Shower System Is Your First Line of Defense
A high-quality shower system is an absolute game-changer in this proactive approach. By their very design, these systems are engineered to minimize the nooks, crannies, and joints where moisture and soap scum love to build up.
The CRANACH shower system shown here is a perfect example of this modern thinking. It features sleek, non-porous surfaces that are incredibly easy to wipe dry after every use.
This kind of integrated design doesn’t just look clean and minimalist; it makes your cleaning routine faster and way more effective. There are simply fewer places for mold to even begin its lifecycle.
Of course, pairing these advanced materials with vigilance is key. Even a tiny, persistent drip can undermine all your hard work, so checking for leaks is crucial. If you spot a problem, you can learn how to fix a leaky faucet shower to keep your defenses strong. For any joints you do have, always insist on using a mold-resistant grout and 100% silicone caulk. This creates a final, durable seal that locks moisture out for good.
Proactive Maintenance to Stop Mold Before It Starts
Even a perfectly designed, well-ventilated shower needs a little ongoing attention to stay mold-free for good. The real trick isn’t getting good at cleaning mold—it’s getting good at preventing the moisture that lets it grow in the first place. You have to become a bit of a detective, regularly checking the weak points in your shower’s defenses.
From my experience, the most common culprits letting water behind your walls are cracked grout and failing caulk. Once those seals break down, water has a direct path into the wall cavity every time you shower. It creates a dark, damp playground where mold thrives completely out of sight. I recommend making it a monthly habit to visually inspect every single inch of your grout and caulk lines.
Sealing the Gaps
If you spot caulk that’s cracked, peeling, or shrinking away from the wall, it’s time to act. Don’t just slap a new layer over the old stuff; that’s just a temporary band-aid and won’t create a lasting seal. You have to completely remove the old, failing caulk first.
Once it’s all gone and the area is totally clean and dry, apply a fresh bead of a high-quality, 100% silicone caulk—specifically one that’s labeled as mold-resistant. This creates a flexible, durable barrier that truly locks moisture out.
An equally important culprit for hidden moisture is a slow, persistent drip. A leaky showerhead or handle might seem minor, but it creates the constant dampness that mold loves, undermining even the best cleaning and ventilation efforts.
Spotting and Fixing Leaks
Make a point to regularly check your shower system for drips after the water has been shut off. A slow leak can also affect your water pressure. If you notice a drop in performance, it could be a sign of a bigger problem. Our guide offers some useful tips on how to increase water pressure in your shower, which can help you troubleshoot these kinds of issues.
This kind of routine check-up is the ultimate strategy for how to avoid mold in shower spaces. By stopping water before it ever gets behind your walls, you’re making sure your bathroom stays structurally sound and completely inhospitable to mold for years to come.
Answering Your Top Questions on Shower Mold
Let’s round things out by tackling some of the most common questions I hear from homeowners. Getting straight answers to these specific concerns can really build your confidence and help you fine-tune your mold prevention strategy.
One of the biggest worries is figuring out when a few spots cross the line into a serious problem.
When Should I Worry About a Mold Problem?
It’s time to call in a professional when you see large patches of mold covering more than just a few square feet. That’s a clear sign it’s beyond a simple DIY cleanup.
Another huge red flag is a persistent, musty smell that just won’t go away, even after you’ve scrubbed everything down. This usually points to a hidden issue, like mold growing behind your tiles because of a slow, sneaky leak. If you notice the drywall feels soft or looks discolored, that’s an urgent signal of water damage that needs an expert.
Are Natural Cleaners as Effective as Bleach for Mold?
For your regular cleaning routine, natural options like white vinegar are often the better choice. Vinegar is acidic enough to kill mold spores on the surface and does a fantastic job dissolving the soap scum that mold loves to feed on. It’s perfect for that weekly wipe-down.
Bleach, on the other hand, is a bit of a one-trick pony. It can kill surface mold on non-porous materials but doesn’t penetrate porous grout well. Over time, it can even damage the grout itself. It’s best to save the harsh chemicals for those really stubborn, set-in stains, and always make sure the room is well-ventilated when you use them.
A modern shower system can be a game-changer. By their very design, these systems get rid of the classic hiding spots for mold. Instead of countless tiles and grout lines, they use large, non-porous panels, leaving far fewer places for moisture and grime to build up.
This is one of those smart, long-term investments that creates a healthier bathroom with way less maintenance. A quality CRANACH shower system, for example, is engineered with smooth surfaces and minimal seams, making the whole area incredibly easy to wipe clean and keep dry. Weak water flow can also let soap scum linger, so learning how to increase pressure of water in your shower ensures everything gets rinsed away properly.
At CRANACH, we believe a healthy home starts with smart design. Upgrade to a modern shower system engineered to resist mold and simplify your cleaning routine. Explore our collection of innovative shower systems today!