


您的购物车目前是空的!

How to Clean a Shower Head Vinegar: Complete Guide
Why Your Shower Head Is Failing You
If you're dealing with frustratingly weak water pressure, it's not just a minor annoyance—it's a clear sign your shower head is fighting a losing battle. Over time, minerals like calcium and magnesium from your water supply build up inside the tiny nozzles. This chalky residue, known as limescale, is what turns your once-powerful shower into a disappointing, sputtering trickle.
Ever notice a white, crusty substance forming around the spray holes? That’s limescale making itself at home. Letting it build up doesn't just ruin your morning shower; it can permanently clog the nozzles, forcing you to buy a whole new fixture. If you live in an area with hard water, this mineral accumulation happens much faster, so you’ll need to clean your shower head more often than someone with softer water.
The Real Cost of a Clogged Fixture
The issue extends beyond just weak pressure. A clogged shower head often means you spend more time in the shower trying to get clean, which wastes both water and energy. This inefficiency is more significant than you might think. In fact, professional analysis has shown that shower heads with heavy mineral deposits can lose up to 40% of their water flow. Thankfully, a simple cleaning can bring that performance right back. This is where knowing how to clean a shower head with vinegar becomes a crucial, money-saving skill. You can learn more by exploring the full report on restoring shower head efficiency.
The early warning signs are easy to spot if you know what to look for:
- Water sprays out at odd angles instead of in a nice, even pattern.
- You notice a gradual but definite drop in pressure over a few weeks.
- There's visible white or even greenish gunk on the nozzles.
Catching these signs early and taking action can stop a small problem from turning into a costly replacement.
Gathering Your Natural Cleaning Arsenal
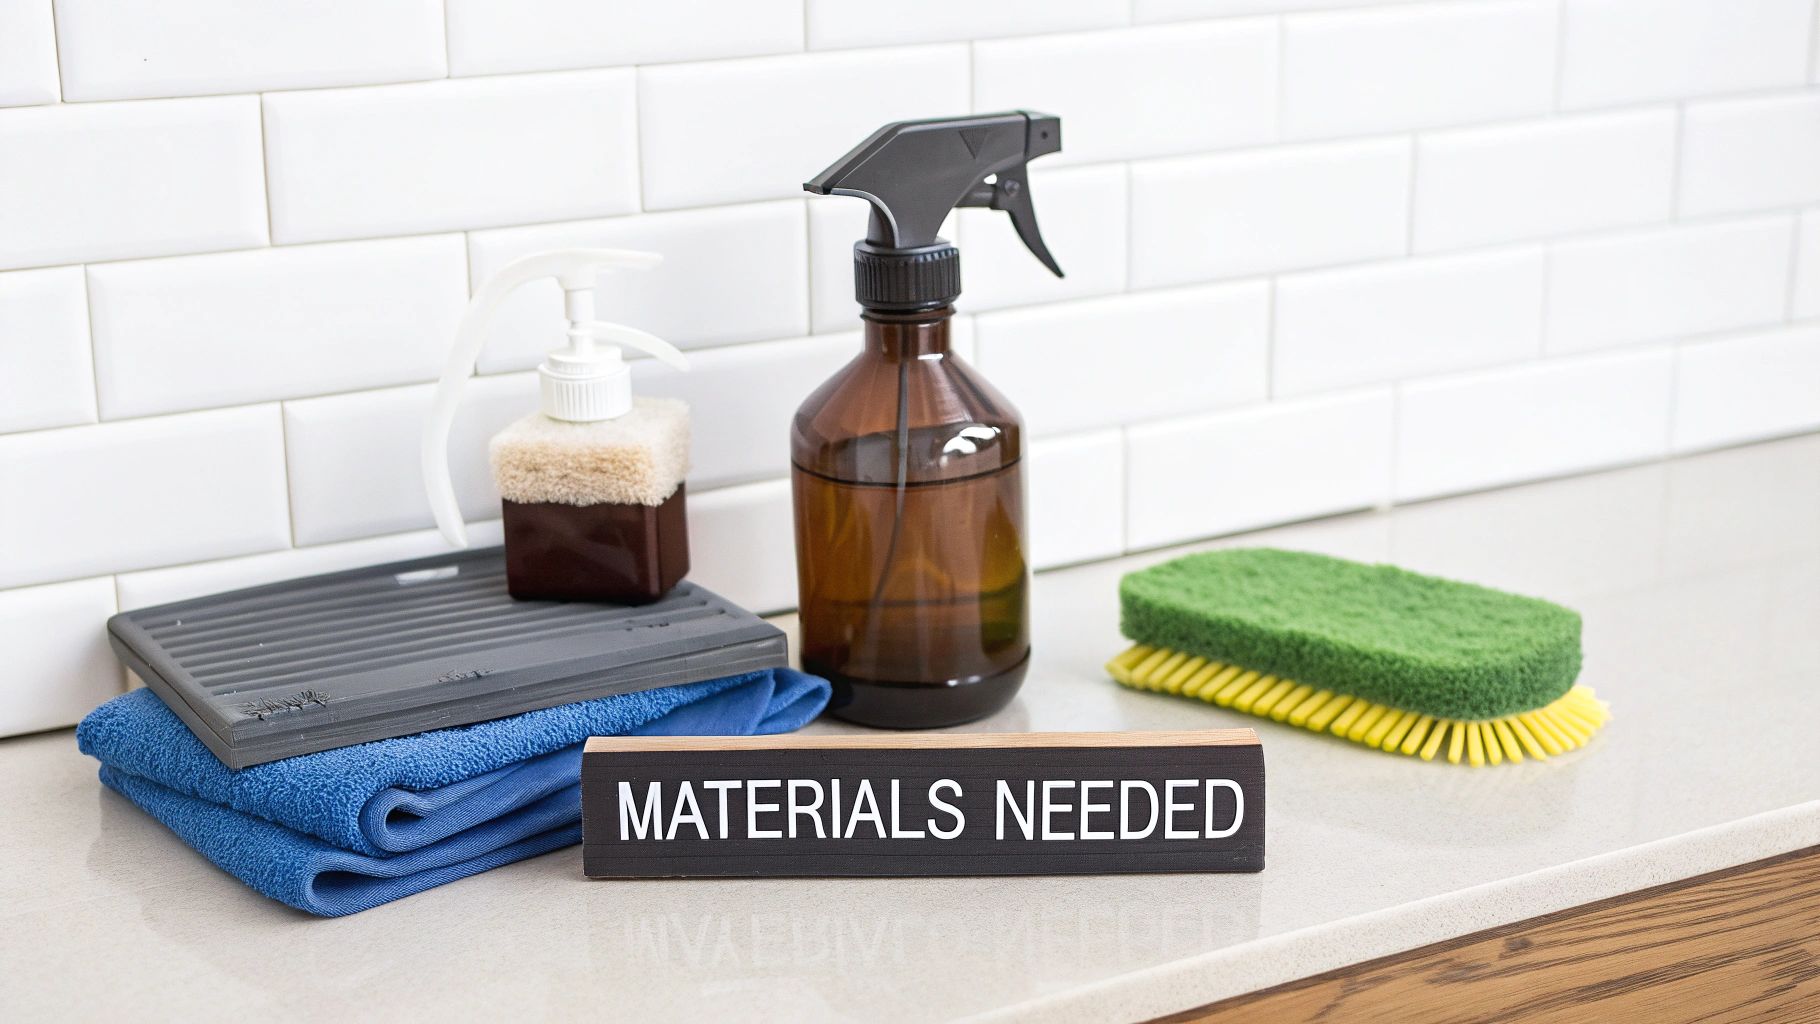
Before diving in, taking a moment to pull together a few simple items will make the whole process go much smoother. The best part about this cleaning method is you probably have everything you need in your kitchen or under a sink right now. The star of the show is, of course, plain white vinegar. Its acetic acid is what works wonders on the mineral scale that clogs up your shower head nozzles. You don't need a special cleaning-grade vinegar; the standard 5% acidity you find in any grocery store brand is strong enough to do the job without damaging most common fixture finishes.
Next, you'll need a plastic bag that’s big enough to fit over the entire face of the shower head and hold enough vinegar to submerge it. A gallon-size freezer bag is a great choice because its thicker plastic is less likely to spring a leak mid-soak. To hold the bag in place, a sturdy rubber band or a couple of twist ties will work perfectly. Lastly, find an old toothbrush or a small, soft-bristled brush to help with the final scrub-down.
Essential Supplies for Vinegar Shower Head Cleaning
To make sure you're not running around looking for things with a dripping bag of vinegar in your hand, here is a complete checklist of what you'll need.
| Item | Purpose | Alternative Option |
|---|---|---|
| White Vinegar | The acidic cleaning agent that dissolves mineral buildup and limescale. | Any distilled white vinegar with 5% acidity is perfect. No need for specialty products. |
| Plastic Bag | Used as a container to hold the vinegar and submerge the shower head. | A thicker freezer bag is recommended for durability. A sturdy produce bag could also work. |
| Rubber Band or Twist Tie | Secures the plastic bag tightly to the shower arm, preventing leaks. | A hair tie or a piece of string will work just as well in a pinch. |
| Old Toothbrush | Needed for scrubbing away any loosened gunk or stubborn residue after the soak. | A small nylon scrub brush or even a designated cleaning sponge can be used instead. |
Having these simple items ready to go makes the job quick and mess-free. The core principle of using a mild acid to break down deposits is effective across your bathroom.
This straightforward approach isn't just for shower heads. If you're looking to get your whole bathroom shining, you can apply similar techniques to other fixtures. For more tips, check out our guide on cleaning bathroom faucets to keep your space looking its best.
The Vinegar Soaking Method That Delivers Results
Now we get to the part where the magic happens. This is the classic vinegar soaking technique that turns a weak, clogged-up trickle back into the powerful, refreshing shower you remember. You can skip the harsh chemicals; this method just uses the simple power of plain white vinegar to dissolve all that gunk for you.
Securing the Bag for a Leak-Free Soak
Your first job is to get that vinegar working on the clogged nozzles. Pour enough white vinegar into a plastic bag to completely cover the face of the shower head. Don't go overboard, or you'll end up with a vinegar-scented puddle on your shower floor.
Carefully slide the bag over the shower head until all the little spray holes are submerged. Then, pull the bag tight against the shower arm and secure it with a sturdy rubber band or a couple of twist ties. I always give it a little tug to make sure it's snug. A common mistake is not getting a tight seal, which causes slow leaks and makes the whole soak less effective.
This infographic shows the simple but effective setup of the vinegar-soaking method in action.
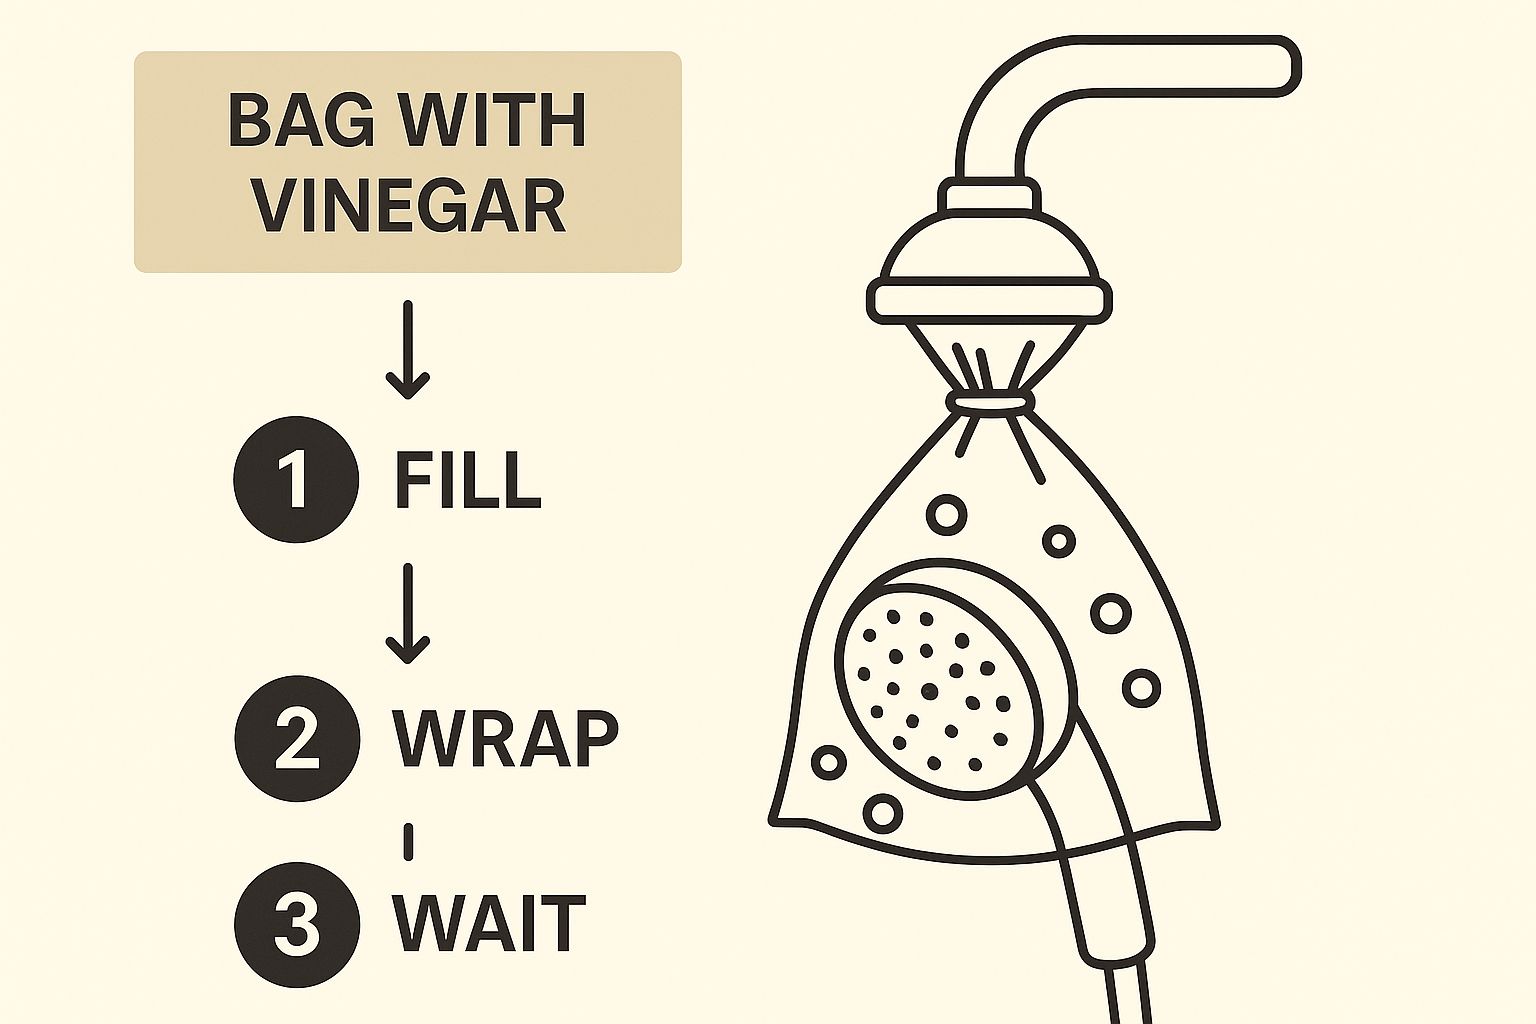
The image shows how the bag should completely envelop the fixture, ensuring every nozzle gets a good, deep clean.
Timing Your Soak for Maximum Impact
Once the bag is secure, it's time to let the vinegar do its work. How long you should wait really depends on two things: how bad the buildup is and what your shower head is made of.
For minor mineral spots, a quick 30-minute soak is often enough to see a difference. But if you're dealing with some serious, caked-on deposits, letting it sit for a few hours—or even overnight—can produce amazing results.
There's one huge exception: if you have a gold, brass, or nickel-coated shower head, you must limit the soak to 30 minutes maximum. Any longer, and the acid in the vinegar can start to damage the finish. For more specifics on this, you can learn more about safe cleaning times. For most standard chrome or stainless steel fixtures, a longer soak is perfectly fine. If you have a really stubborn case of limescale, our guide on how to clean a shower head with vinegar has some extra tricks you might find helpful.
Perfecting Your Results With Detailed Follow-Up
Once the vinegar soak has worked its magic, it's time for the final touches that really make a difference. This is what separates a quick rinse from a truly deep clean. After you take off the bag and send the vinegar down the drain, you'll see a lot of the mineral gunk has already come loose. But don't stop there—a little extra effort now will reward you with that powerful, satisfying spray you've been missing.
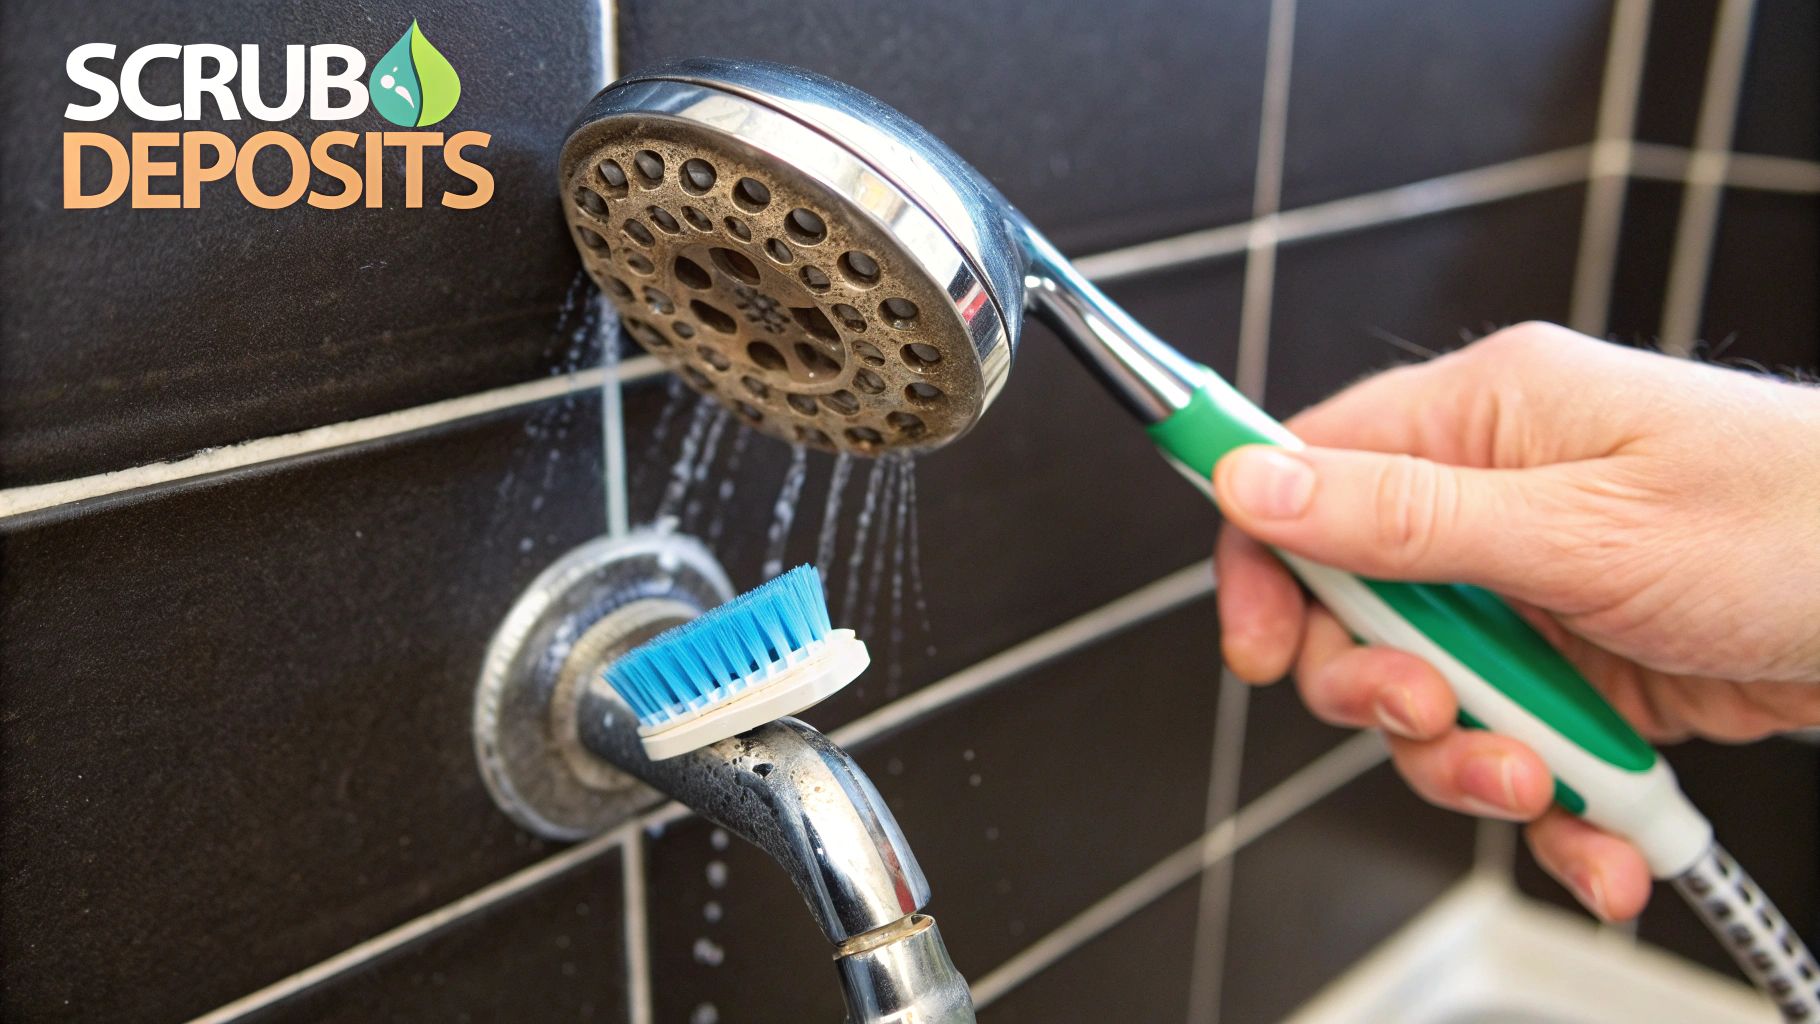
Scrub and Flush Away the Gunk
Now it’s time to deal with any stubborn bits that are still hanging on. An old toothbrush is your best friend for this part. The bristles are just right for getting into the tiny spaces around each nozzle, scrubbing away the softened limescale. Use gentle, circular motions across the shower head's face. You want to be firm enough to dislodge the grime but not so rough that you scratch the finish.
As you can see, a simple brush is all it takes to get into those nozzle openings and clear out what the vinegar soak loosened up.
With the scrubbing done, the last and most important step is to flush it all out. Turn the shower on full blast and let hot water run for a minute or two. The strong flow will force out any leftover mineral bits from inside the fixture, clearing the way for water to spray evenly. It's always so satisfying to see those little white or dark specks wash out—that's how you know you've done the job right.
If you find that some buildup is still clinging on after all that, an extra 30-minute soak should do the trick for those really tough cases. This same idea—using a gentle acid to break down minerals—works for other fixtures, too. If your sink faucet is also looking a bit crusty, our guide on removing calcium deposits from faucets uses similar, effective methods. Finally, give the fixture a quick polish with a soft cloth to make it shine.
Protecting Different Shower Head Materials
While learning how to clean a shower head with vinegar is a fantastic skill, it's not a universal fix. The most important rule is to match your cleaning method to your fixture’s material. What works like a charm on a standard chrome shower head can cause irreversible damage to specialty finishes like brass or matte black. It’s a tough lesson some homeowners learn after discovering their enthusiastic cleaning has stripped the protective coating, leading to ugly discoloration or peeling.
Identifying Your Fixture's Material
Before you grab the vinegar, take a moment to figure out what your shower head is made of. Most modern fixtures are chrome-plated or stainless steel, which are quite durable and can handle a longer vinegar soak. However, if your fixture has a warmer, golden color, it’s probably brass. Other common finishes you might see are oil-rubbed bronze (a dark brown), brushed nickel (a soft, matte metallic), or coated finishes like matte black.
These more delicate materials are much more sensitive to vinegar's acidity, so you need to be careful. A very short soak is the secret to avoiding damage. A clean fixture is crucial for good water flow, and if you're looking to improve your shower's performance, you might find our guide on how to increase shower water pressure helpful.
Cleaning Guidelines by Shower Head Material
To keep your fixture safe and looking its best, it's a good idea to follow material-specific guidelines. The table below breaks down the safe soaking times and special considerations for different finishes. When in doubt, always start with a shorter soak and a weaker vinegar solution—you can always repeat the process if needed. This careful approach ensures you get rid of the mineral buildup without harming the finish.
Cleaning Guidelines by Shower Head Material
Safe soaking times and special considerations for different fixture materials
| Material | Max Soaking Time | Special Precautions | Cleaning Frequency |
|---|---|---|---|
| Chrome & Stainless Steel | Up to 12 hours | Very durable; can handle prolonged soaking for heavy buildup. | Every 3-6 months |
| Brass & Gold-Plated | 30 minutes | Highly sensitive to acid; any longer risks permanent finish damage. | Every 2-3 months |
| Nickel (Brushed/Polished) | 30 minutes | Prone to spotting; rinse thoroughly and polish with a soft cloth. | Every 2-3 months |
| Coated (Matte Black, Bronze) | 15-30 minutes | Use diluted vinegar (1:1 with water); avoid scrubbing to prevent scratches. | Every 1-2 months |
As you can see, durable materials like chrome and stainless steel can handle a long soak, which is great for tackling serious hard water deposits. On the other hand, finishes like brass and nickel need a much gentler, quicker treatment to avoid any damage. For coated finishes, diluting the vinegar is a smart move to protect the surface while still getting the job done.
Building a Realistic Maintenance Schedule
A sparkling, full-pressure shower is a fantastic reward for your cleaning efforts, but keeping it that way takes a little bit of planning. Without a simple maintenance strategy, you'll find yourself right back where you started, fighting stubborn buildup all over again. The idea isn't to add another overwhelming chore to your list; it's about creating a smart, manageable routine that fits into your real life and keeps your shower performing its best.
Finding Your Cleaning Rhythm
For most homes, a quarterly deep clean is a great place to start. Setting a reminder to give your shower head a vinegar soak every three months is a practical way to stop major limescale problems before they begin. However, if you live in an area with particularly hard water, you might need to adjust this schedule. The biggest warning sign? When you see water jets spraying sideways or notice the pressure dropping just a month or two after a good cleaning. That's your signal to clean it more often, maybe every other month.
To get into a good rhythm, it can be helpful to see how other equipment is cared for. For example, looking at a detailed kitchen equipment maintenance checklist can offer solid ideas for proactive care, a principle that works just as well for your bathroom fixtures.
Daily Habits That Make a Difference
You don't always need to do a full soak to keep water flowing freely. A few quick daily habits can have a surprisingly big impact and stretch the time between deep cleans.
- Wipe it down: After the last shower of the day, grab a soft cloth and give the face of the shower head a quick wipe. This removes water droplets before they have a chance to dry and leave mineral deposits behind.
- Flex the nozzles: If your shower head has those flexible rubber nozzles, give them a quick rub with your fingers once a week. This simple action helps break up any new mineral deposits before they can harden and become a real problem.
These tiny actions, which take only a few seconds, are your best defense against buildup. They work alongside your deep cleaning schedule to make sure that knowing how to clean a shower head with vinegar stays an occasional task, not a constant battle. This same approach of regular, simple maintenance can be applied all over your home. In fact, keeping all your fixtures in top shape creates a cohesive, well-maintained look, which is a major part of modern design. You can see more on how fixture upkeep fits with current styles in our article on kitchen faucet trends.
Key Takeaways
We’ve walked through everything from spotting mineral buildup to getting your cleaning method just right. Now, let’s tie it all together with a handy summary. This is your go-to cheat sheet for making sure your shower head works perfectly and looks great. Getting the hang of how to clean a shower head with vinegar is all about remembering a few core ideas.
The Essential Vinegar Cleaning Checklist
A successful clean really just boils down to a few key actions. Whether this is your first time trying this or you're a seasoned pro, running through this mental checklist will help you get fantastic results.
- Gather Your Gear: First things first, get your tools ready. You’ll need some basic white vinegar (the standard 5% acidity is perfect), a sturdy plastic bag, and a rubber band or zip tie. Having an old toothbrush nearby for that final scrub is a great idea.
- Check Your Shower Head's Material: This is the most important step, and one people often forget. Most chrome and stainless steel fixtures can soak for a few hours without any issues. However, if you have a more delicate finish like brass, gold, or matte black, you'll want to keep the soak short—usually 30 minutes or less—to avoid damage.
- Get a Good Seal: Make sure the shower head is completely underwater in the vinegar. A secure, leak-free bag is crucial so the vinegar can do its job and break down all those stubborn mineral deposits.
- Scrub and Flush It Out: Once the soak is done, don't skip the scrub! Use your brush to get into the nozzles and dislodge any gunk the vinegar softened up. To finish, turn the hot water on full blast for a minute or so to flush out any leftover debris from inside the shower head.
Long-Term Success and Troubleshooting
The real secret to avoiding future clogs is regular maintenance. Try to stick to a schedule that makes sense for your water quality—for most homes, a cleaning every 3-4 months is about right. If you have particularly hard water, you might need to do it more often. Tacking this onto your seasonal cleaning routine is a great way to give your whole bathroom a refresh. For more inspiration, check out these great ideas to update your entire bathroom.
If you’ve tried it once and the water pressure isn't quite back to normal, don't worry. The most common reason is simply not soaking it long enough for the amount of buildup. If your fixture isn't coated, you can just repeat the process. By sticking with these strategies, you’ll bring back that powerful water pressure and help your fixtures last much longer.
At Cranach, we believe a clean, healthy shower is a cornerstone of a great home. Our shower systems are designed to be both beautiful and easy to care for, so you can enjoy a perfect shower every day. Feel free to explore the Cranach collection to discover a fixture that matches your commitment to a cleaner, more enjoyable home.
Leave a Reply