

您的购物车目前是空的!
Best Way to Clean Shower: Easy Tips for a Sparkling Bathroom
The best way to clean a shower isn't about scrubbing harder. It’s about cleaning smarter, using a simple top-to-bottom method that saves you a ton of frustration. This approach is all about working with gravity, not against it, to make sure you're not re-cleaning spots you've already hit.
Your Smart Strategy for a Spotless Shower
A genuinely clean shower can completely change the feel of your bathroom, turning it from just another room into a personal retreat. The secret isn't in harsh chemicals or spending hours on your knees scrubbing. According to homekeeping experts at Better Homes & Gardens, it's about having a logical game plan. When you know how to tackle common headaches like stubborn soap scum, cloudy hard water stains, and mildew, you can keep your shower looking pristine with a lot less effort.
This method gives you a solid foundation to confidently clean every inch of your shower, turning a dreaded chore into a manageable routine. It all starts by making gravity your best friend.
Why Top-to-Bottom Cleaning Works
It just makes sense: start at the highest point—usually the shower head—and work your way down to the floor. As you spray, wipe, and scrub, all the loosened grime, soap scum, and mineral deposits have to go somewhere, and that somewhere is down. If you clean the shower floor first, you'll just end up rinsing all the gunk from the walls right onto your clean floor. Working from the top down saves time and keeps you from doing the same job twice.
Keeping your shower clean is also a big win for your health. A moist environment is a breeding ground for bacteria and mold, but a simple routine of daily rinses and weekly deep cleans can drastically cut down on germs.
The Role of Modern Fixtures
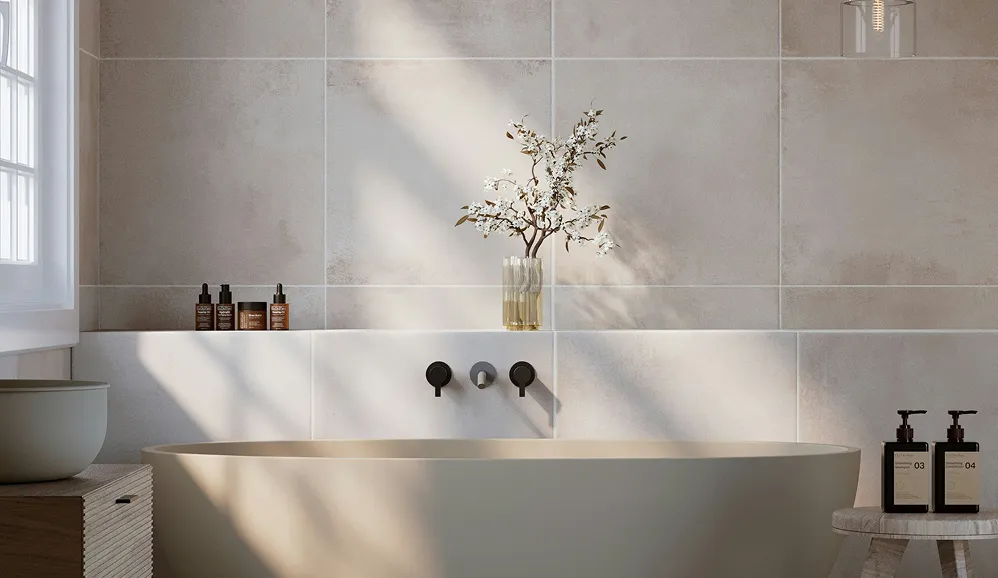
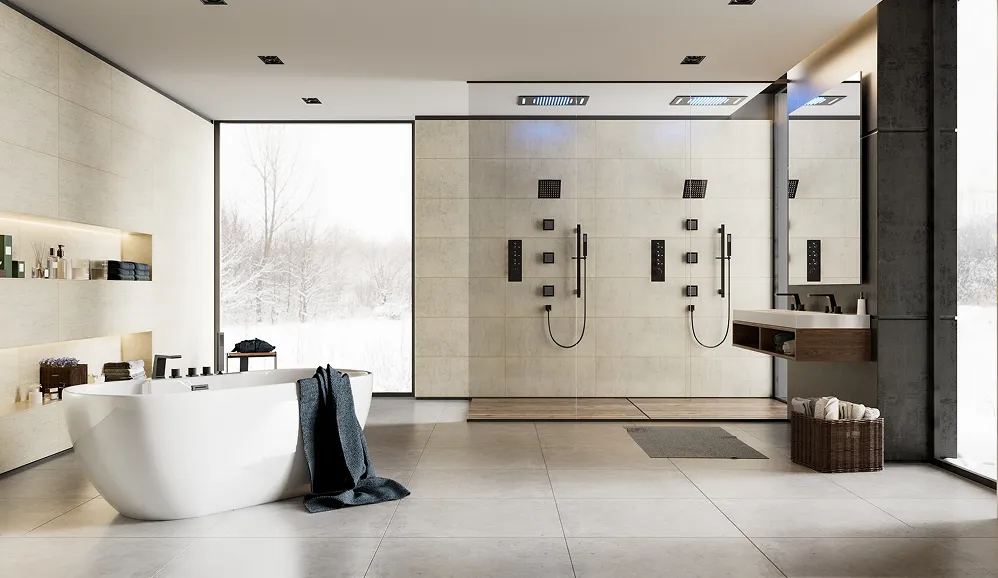
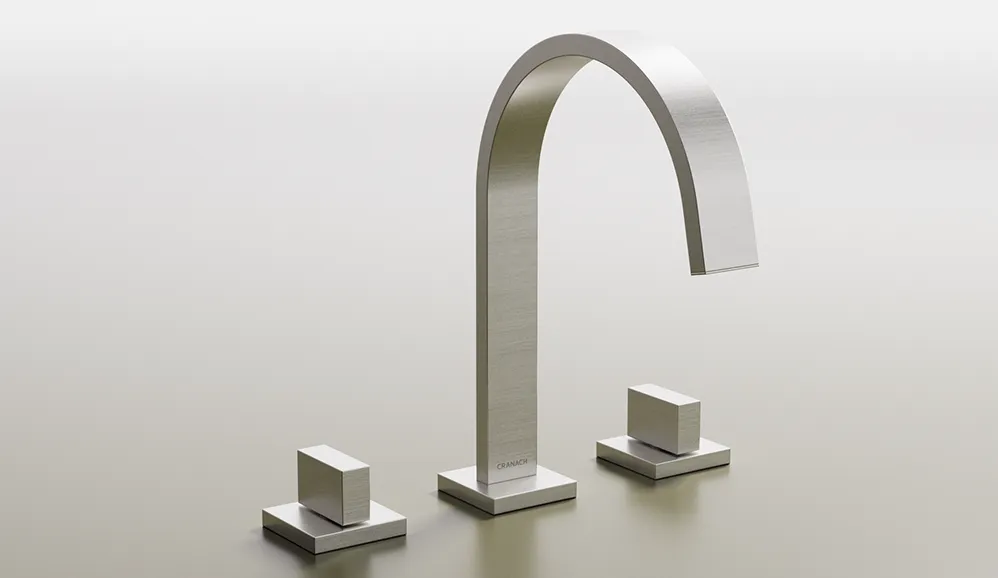
You might be surprised how much your shower fixtures can simplify cleaning. Many modern shower systems are designed with materials that naturally resist water spots and soap scum. Take the CRANACH Rugen shower set, for instance. It's engineered with easy-to-clean surfaces that make long-term maintenance much less of a headache. You can find more details in our official CRANACH care and cleaning guide.
By investing in high-quality fixtures like the Rugen shower, you're not just upgrading your bathroom's style—you're also making your cleaning routine more efficient for years to come.
These thoughtfully designed products have fewer nooks and crannies for grime to hide in, helping you maintain that "just-cleaned" look with minimal effort. Ready to find the perfect Rugen shower set for your home? You can explore our premium collection here.
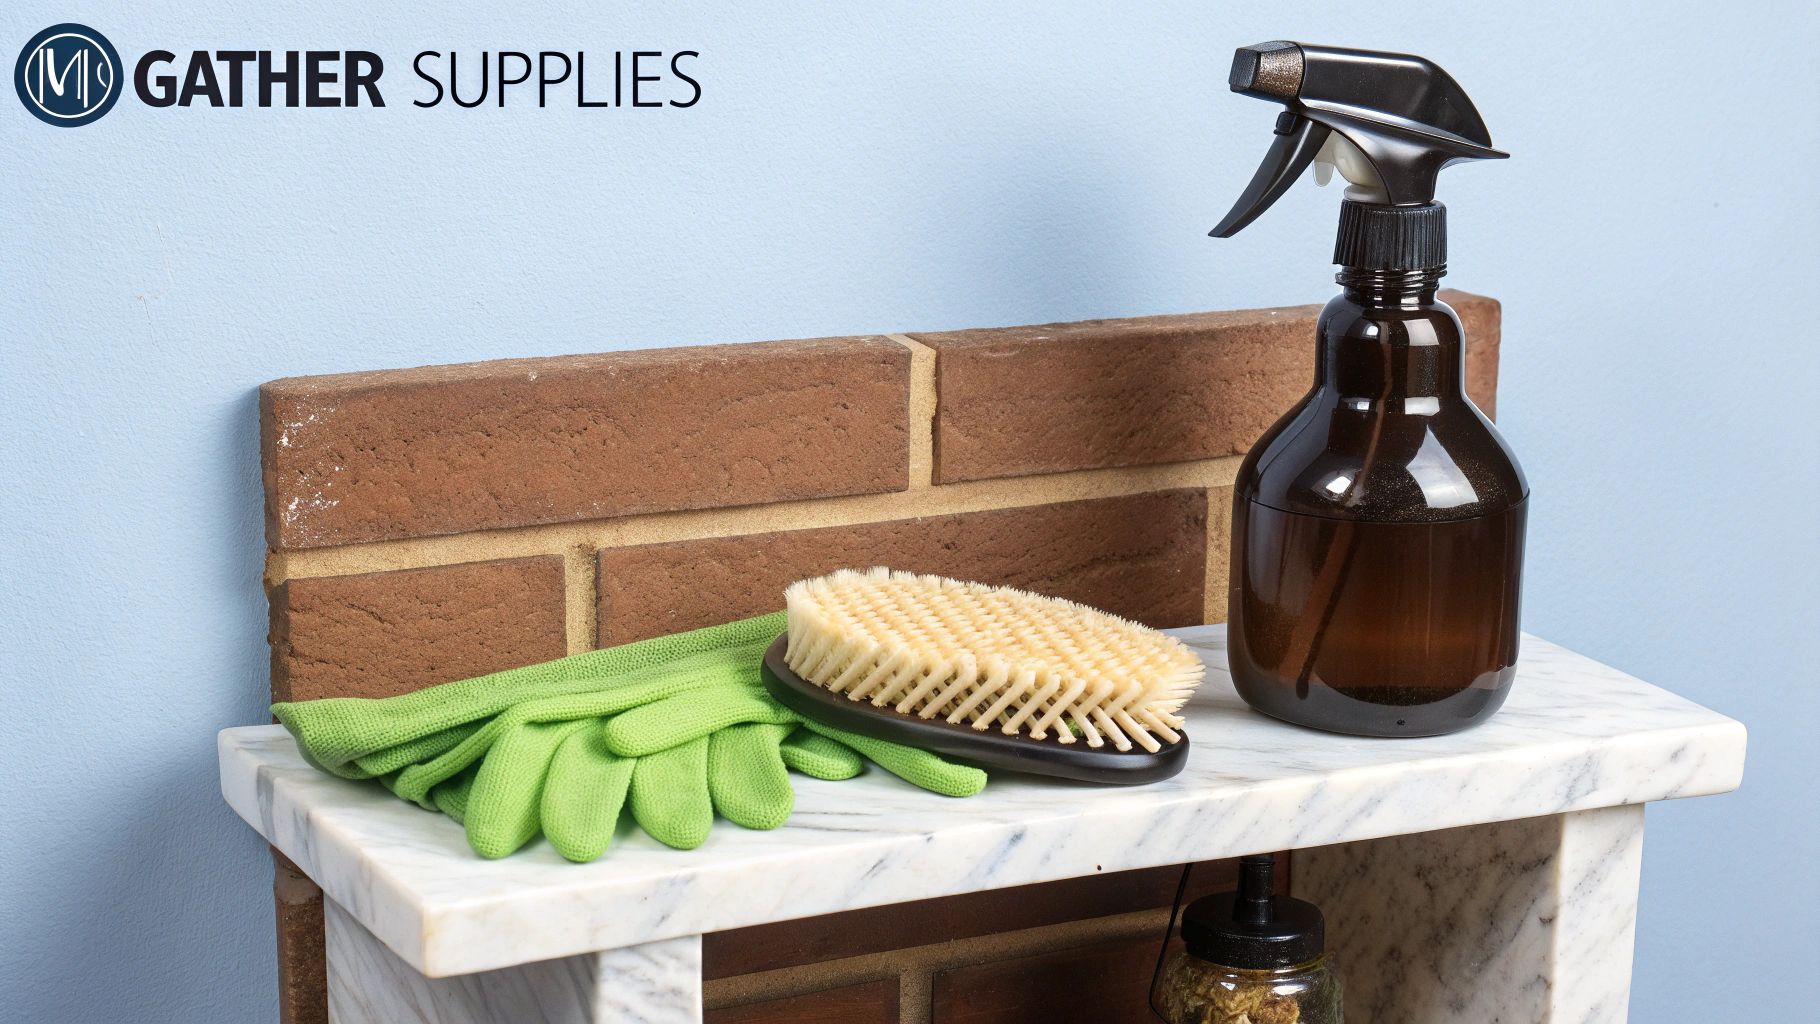
Assembling Your Shower Cleaning Toolkit
Before you even think about turning on the water, the best way to clean shower surfaces is to get all your supplies ready first. Having everything you need within arm's reach means no more pausing mid-scrub to hunt for a brush or another cloth. It takes the job from a frustrating scramble to a smooth, methodical process.
Think of it like cooking a great meal—you wouldn’t start without prepping your ingredients. That same logic applies here. Proper preparation is the real secret to getting a professional-level clean, ensuring you can tackle every nook and cranny without losing momentum. A great toolkit doesn't need to be complicated; it just needs to be effective.
Your Essential Cleaning Checklist
Your shower cleaning arsenal should be versatile enough to handle everything from a gentle wipe-down to some serious targeted scrubbing. Here’s a simple but powerful list of must-haves:
- Spray Bottle: An absolute essential for applying your homemade cleaning solutions evenly across large surfaces like walls and glass doors.
- Microfiber Cloths: Get a few of these. Their absorbent, non-abrasive texture is perfect for wiping down walls, fixtures, and glass without leaving lint or streaks behind.
- Squeegee: This is your best defense against water spots and soap scum buildup. A quick squeegee after each shower is a total game-changer for daily maintenance.
- Non-Scratch Scrub Brush: Look for one with bristles that are stiff enough to tackle stubborn grime on tile and in the tub but gentle enough that they won't cause damage.
- Old Toothbrush: Nothing gets into tight corners, grout lines, and the base of faucets better than a small detail brush. An old toothbrush is perfect for this.
With these basic tools, you’re equipped to handle just about any cleaning scenario your shower can throw at you.
DIY vs Commercial Cleaners
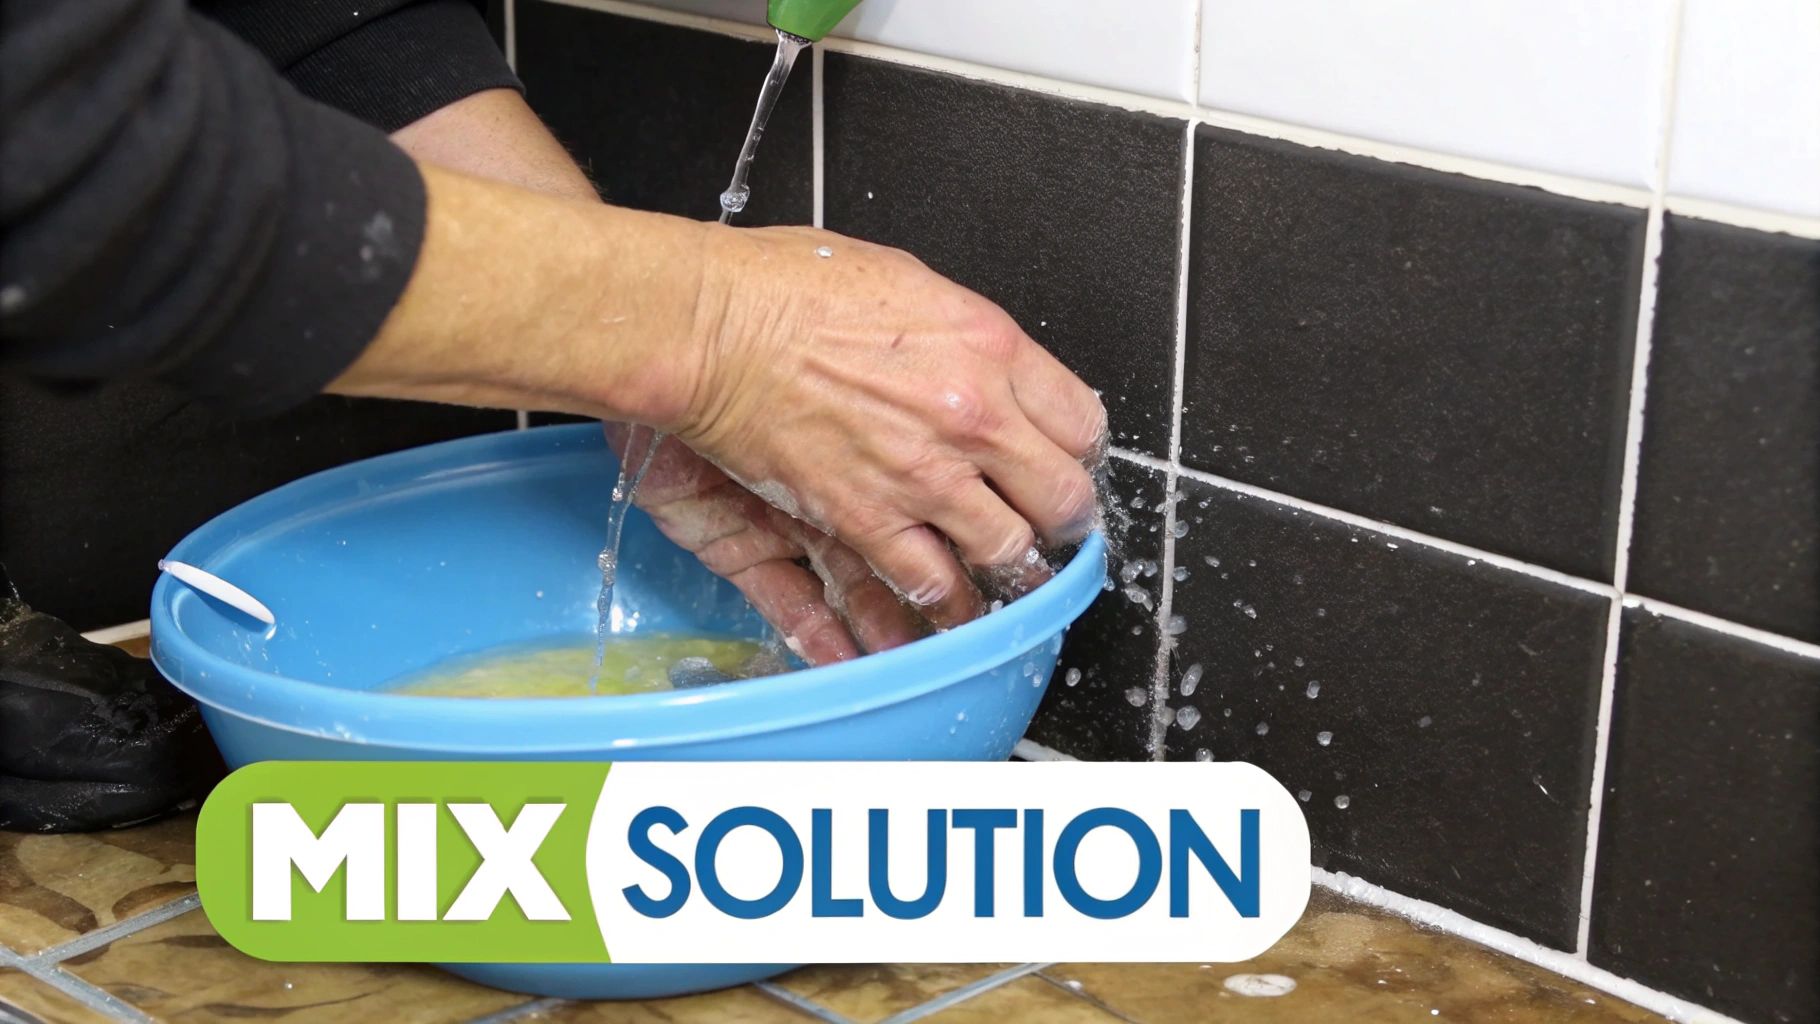
When it comes to the actual cleaning agents, you've got a couple of paths you can take. A lot of people lean towards homemade solutions for their simplicity and lack of harsh chemicals. A simple mixture of white vinegar and water is fantastic for dissolving hard water stains and soap scum. For tougher jobs, a paste made from baking soda and water offers a gentle abrasive power that works wonders on grout.
While DIY cleaners are surprisingly effective, sometimes you need to bring in the big guns. Commercial cleaners are specifically formulated to tackle stubborn problems like severe mildew or deep-set stains that homemade solutions might not touch. The key is knowing which one is right for the job.
It’s also worth remembering that a clean shower head is crucial for good water pressure and overall hygiene. If yours is looking a little clogged, we have a complete guide on how to clean a shower head.
Deciding between a pantry staple and a store-bought product can be tricky. Here’s a quick breakdown to help you choose the right cleaner for your shower's specific needs.
DIY vs Commercial Shower Cleaners
| Cleaning Agent | Best For | Pros | Cons |
|---|---|---|---|
| Vinegar & Water Solution | Everyday soap scum, hard water spots, glass doors. | Inexpensive, non-toxic, eco-friendly. | Strong smell, may damage natural stone like marble. |
| Baking Soda Paste | Grout, stubborn stains on tile and fiberglass. | Gentle abrasive, effective deodorizer, cheap. | Can be messy, requires some scrubbing effort. |
| All-Purpose Bathroom Cleaner | General disinfection and cleaning on most surfaces. | Convenient, formulated to kill germs. | Can contain harsh chemicals, strong fumes. |
| Mold & Mildew Remover | Visible mold or mildew growth in grout or caulk. | Highly effective, often requires no scrubbing. | Contains strong chemicals (like bleach), requires good ventilation. |
Ultimately, having both DIY ingredients and a trusted commercial cleaner on hand means you’re ready for anything, from a quick weekly wipe-down to a deep-cleaning marathon.
A crucial safety reminder: Never, ever mix different cleaning products, especially anything containing bleach with ammonia-based cleaners. This combination can create dangerous toxic gases. The Environmental Protection Agency (EPA) provides guidance on safer cleaning products. Always make sure your bathroom is well-ventilated by opening a window or running the exhaust fan whenever you’re cleaning.
Your Top-to-Bottom Deep Cleaning Method
Alright, you've got your toolkit ready, so let's put it to work. The best way to clean a shower isn't about scrubbing harder—it's about working smarter. We're going to use a top-down approach that’s both logical and efficient, making sure you aren't dripping dirty water over areas you just cleaned.
We’ll start with the shower head and move methodically down through the walls, doors, floor, and fixtures. Each spot gets the specific attention it needs for a deep, lasting clean. This process saves you time and prevents those annoying streaks and drips on your freshly sparkling surfaces.
Starting with the Shower Head
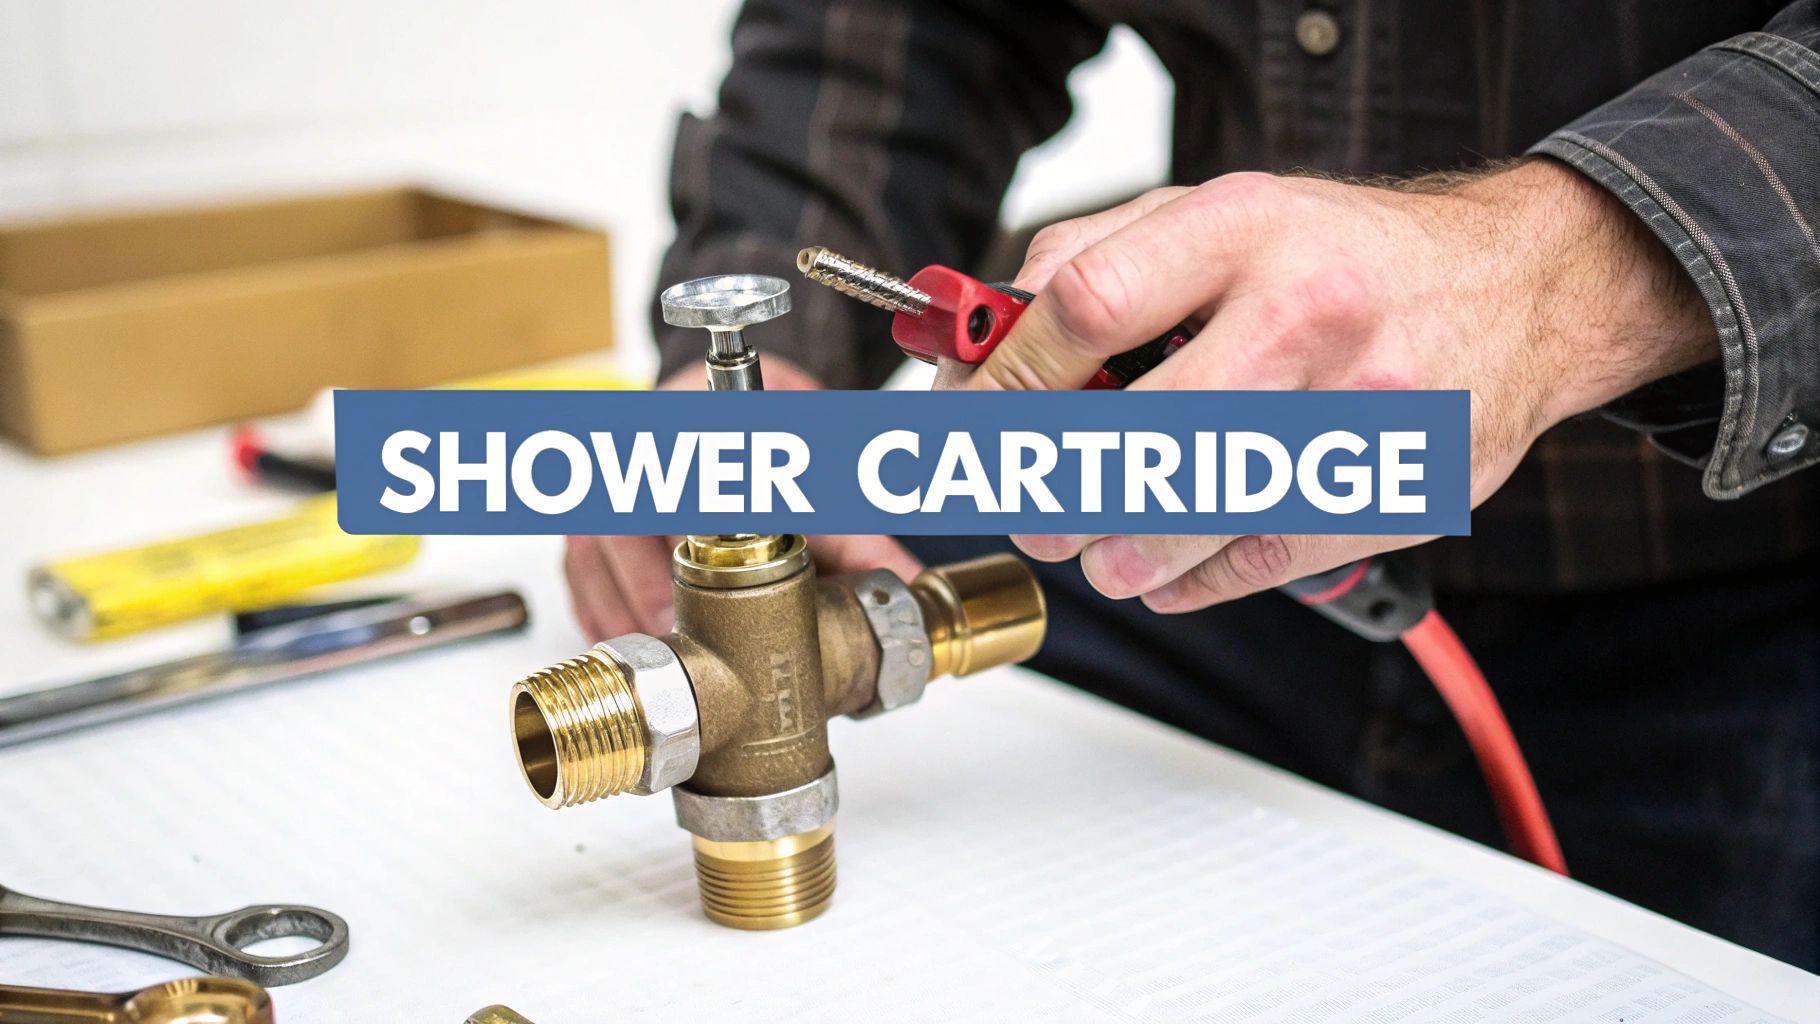
Your shower head is the highest point, so it’s the natural place to begin. Over time, mineral deposits from hard water can clog the nozzles, which kills your water pressure and creates a perfect little home for grime. A clean shower head isn't just for looks; it's about making sure your shower actually works well.
Cleaning a shower head used to be a real chore, involving long soaks in harsh acids and separate disinfection steps. Thankfully, modern innovations have simplified this. Specialized products can now descale and disinfect in as little as 15 minutes, cutting cleaning time by nearly 80%. You can dive deeper into these advanced shower head cleaning techniques if you're curious. But for most homes, a simple DIY soak does the trick just fine.
Walls, Doors, and Fixtures
Once the shower head is sorted, it’s time to tackle the walls and glass doors. This is where soap scum and water spots love to show up.
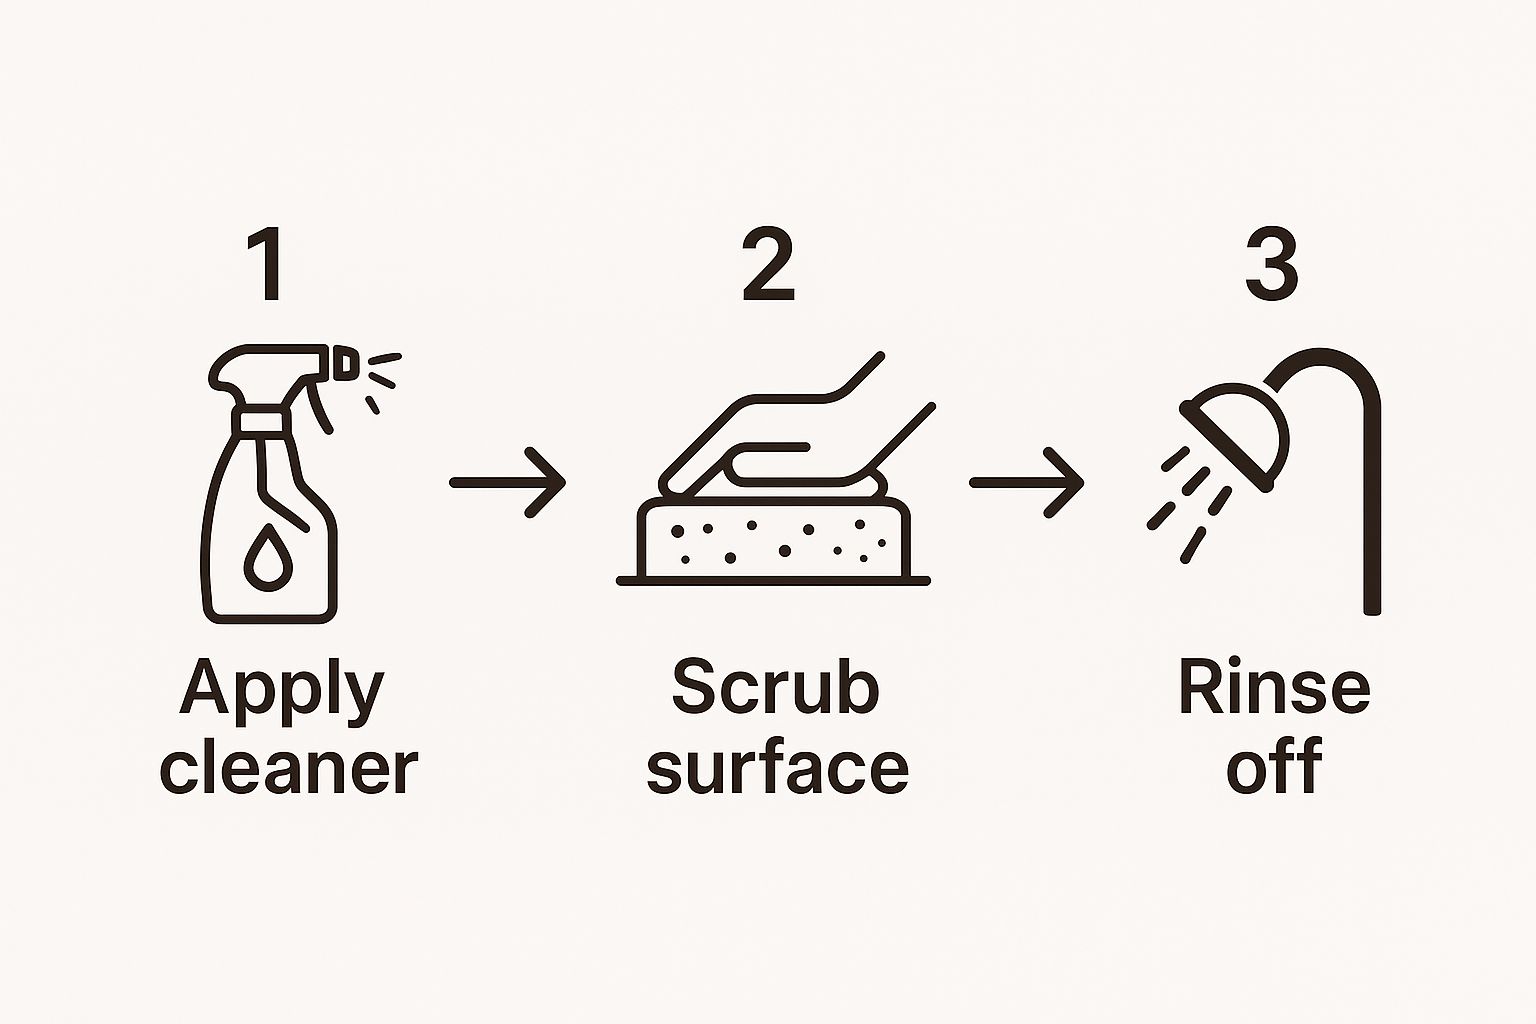
Spray your chosen cleaner generously across these surfaces and just let it sit for several minutes. Seriously, don't skip this step. That dwell time is crucial—it allows the cleaner to penetrate and break down all that buildup, which means way less scrubbing for you.
For fixtures like the handles and faucet, a gentle cleaner on a microfiber cloth is usually all you need to bring back their shine without risking scratches. Fixtures on a high-quality system, like the CRANACH Rugen shower set, are a dream to clean. They're designed with durable finishes that resist tarnish and buildup, making this step almost effortless.
You can see how the minimalist design of the Rugen shower features smooth surfaces and clean lines that leave fewer places for grime to hide. A system designed for simple maintenance makes your whole cleaning routine more efficient. You can find a dealer near you to see them for yourself.
The Shower Floor and Grout
The shower floor and grout lines catch everything that rinses down from above, so they bear the brunt of the dirt and soap scum. By saving this area for last, you guarantee you're only cleaning it once.
Apply your cleaner to the floor, paying extra attention to the grout lines. Grout is porous and can easily trap mildew, so it needs a bit more focus. Use a scrub brush to agitate stubborn spots and grab an old toothbrush to really get deep into those grout lines.
The process is simple but effective: let the cleaner do the heavy lifting, use targeted scrubbing for the tough areas, and then rinse everything thoroughly. A final, comprehensive rinse from top to bottom washes away all the loosened grime and cleaning residue, leaving nothing but a sparkling clean shower.
For professionals looking to install these kinds of high-quality, low-maintenance systems, the CRANACH Pro program is worth exploring for partnership opportunities.
Tackling Tough Grout Mildew and Hard Water Stains
Even if you’re on top of your regular cleaning, some problems just need a little extra muscle. I’m talking about stubborn grout mildew and those chalky hard water stains that can make even a clean shower look grimy. But don’t worry, with the right approach, you can get every surface looking brand new again.
Think of this as your troubleshooting guide for the most frustrating shower challenges. We'll skip the generic advice and focus on powerful, specific solutions that cut through the grime without forcing you to scrub for hours—which can damage your beautiful tiles and fixtures. These techniques are crucial for keeping high-quality systems, like a CRANACH Rugen shower set, looking pristine for years.

Conquering Grout Mildew
Grout is porous, which unfortunately makes it the perfect home for mildew. When you see those dark, unsightly stains creeping into the lines between your tiles, a simple but powerful paste is often the best way to clean shower grout without harsh chemicals.
Just mix up a thick paste using baking soda and hydrogen peroxide. Grab an old toothbrush and work it directly into the grout lines, making sure you get full coverage. You’ll want to let it sit and bubble for at least 15 minutes. That bubbling action is the peroxide lifting the stains right out. After that, give it a gentle scrub and a thorough rinse.
Dissolving Hard Water Stains and Soap Scum
If you have hard water, you know all about the chalky white mineral deposits it leaves behind, especially on glass doors and metal fixtures. The secret to breaking these down is a mild acid. My go-to is a simple solution of equal parts white vinegar and warm water in a spray bottle. It works wonders.
Spray the mixture generously all over your glass and fixtures, and just let it sit for about 10 minutes. You need to give the vinegar time to dissolve the mineral buildup. Once it's done its job, you can simply wipe it all away with a microfiber cloth. For really caked-on deposits on your faucets, we have a detailed guide on removing calcium deposits from faucets.
When confronting particularly stubborn mineral deposits, it's helpful to consider advanced strategies. You can learn about effective methods for removing limescale in various bathroom fixtures, as many techniques are transferable to shower environments.
Maintaining Your Shower Floor
Keeping the shower floor clean isn't just about looks—it's about safety. Grout lines can trap mold and soap scum, creating a surprisingly slippery surface. I recommend regular cleaning with a pH-neutral cleaner to avoid damaging the tile or grout over time.
For a deeper clean, that same baking soda paste works great on floor grout lines. Just apply it, let it sit for 15 minutes, and then give it a good scrub.
By targeting these specific issues, you’ll keep your Rugen shower looking flawless. If you’re thinking about an upgrade, you can find a showroom near you with our store locator. For professionals, we also have our CRANACH Pro program with exclusive partnership benefits.
How to Keep Your Shower Consistently Clean
A deep clean feels incredible, but let’s be honest, the real secret to a shower that always looks sparkling isn't one marathon scrubbing session. It’s all about consistent upkeep. The best way to clean your shower is to build a simple, manageable routine that stops major buildup before it even gets a chance to start. This proactive approach is what turns a massive, dreaded chore into a few small, easy habits.
By breaking down the maintenance into daily, weekly, and monthly tasks, you can get ahead of problems like stubborn soap scum and mildew. This strategy works particularly well with modern fixtures like the CRANACH Rugen shower set. Its surfaces are designed to resist spotting and buildup in the first place, making this schedule even easier to stick with.
Breaking Down Your Maintenance Routine
Building a routine is all about consistency, not intensity. Just a few minutes each day, and a little more on the weekend, will save you hours of heavy-duty scrubbing down the line. It's a trade-off that's more than worth it.
-
Your Daily Habit (Just 2 Minutes): After every single shower, grab a squeegee and give the glass and tile walls a quick wipe-down. This simple act is a game-changer, removing the water droplets that lead to hard water stains and soap scum. Also, get in the habit of running your exhaust fan for 20-30 minutes after you hop out to slash the humidity.
-
Your Weekly Task (10 Minutes Tops): Once a week, give the entire shower a quick spray with a gentle, pH-neutral cleaner. Let it sit for a few minutes while you brush your teeth, then rinse it all down with hot water. This little step prevents that slow, grimy accumulation that makes deep cleaning such a pain.
-
Your Monthly Check-in (20-30 Minutes): Set aside a bit of time each month to tackle the deeper stuff. This is your chance to inspect the grout for any early signs of mildew, check your shower head for mineral buildup that could be messing with your water pressure, and give the floor and corners a more focused scrub.
This tiered approach ensures nothing ever gets out of hand. It’s how you keep your Rugen shower looking as pristine as the day it was installed.
Your Simple Shower Maintenance Schedule
Here's a straightforward checklist to make it even easier. Think of this as your roadmap to a cleaner shower with less effort. It outlines the what, when, and how, turning maintenance from a guessing game into a clear plan.
| Frequency | Task | Time Estimate | Pro Tip |
|---|---|---|---|
| Daily | Squeegee walls & glass after showering. | 2 minutes | Keep the squeegee hanging inside the shower so you never forget. |
| Daily | Run exhaust fan for 20-30 minutes post-shower. | 0 minutes | Consider installing a fan with a timer so it shuts off automatically. |
| Weekly | Spray with a pH-neutral cleaner and rinse. | 10 minutes | Do this right before your shower so you can rinse it while the water warms up. |
| Weekly | Wipe down fixtures to prevent water spots. | 3 minutes | A quick wipe with a microfiber cloth keeps chrome and stainless steel shining. |
| Monthly | Inspect and scrub grout lines as needed. | 15 minutes | Use an old toothbrush and a paste of baking soda and water for a gentle scrub. |
| Monthly | Check shower head for mineral buildup. | 5-10 minutes | If clogged, soak the head in a bag of white vinegar overnight to dissolve deposits. |
Following this schedule will make your deep cleans far less frequent and much, much easier when they do come around.
Preventing Buildup Before It Begins
In the bathroom, an ounce of prevention is truly worth a pound of cure. Small adjustments to your routine can dramatically reduce how often you need to roll up your sleeves for a deep clean. Running that fan, for instance, is one of the single most effective ways to stop mold in its tracks. For a more detailed look at this, explore our guide on how to avoid mold in the shower.
The goal isn't to spend your life cleaning; it's to create smart habits that do the work for you. A two-minute squeegee routine after your shower can eliminate 80% of the buildup that would otherwise require heavy scrubbing later.
Embracing this proactive maintenance means your shower is always guest-ready, without the last-minute panic. It just becomes part of your home's natural rhythm.
Common Shower Cleaning Questions Answered
Even with the best cleaning plan, a few questions always seem to pop up when you're deep in the trenches. Let's tackle some of the most common ones I hear, so you can handle any cleaning challenge with confidence.
How Often Should I Really Be Deep Cleaning My Shower?
For most homes, a really thorough deep clean once a month is the sweet spot. But, let's be realistic—if you've got a busy family shower that's used multiple times a day, or you live in an area with hard water, you might want to bump that up to every two weeks. This will stop that stubborn mineral and soap buildup before it really takes hold.
The trick is to not let that monthly deep clean be a massive chore. A few simple daily habits, like a quick swipe with a squeegee, and a weekly wipe-down will make a world of difference. Consistency is everything.
Is It Safe to Use Bleach on My Grout?
I'd advise using bleach with a lot of caution. Yes, it's great for whitening stains, but it's a pretty harsh chemical. Over time, it can actually damage colored grout and even wear away at the tile itself. Worse, it can break down the grout sealer, which just invites future stains to set in even faster.
I always recommend starting with a gentler approach. A simple paste made from hydrogen peroxide and baking soda often does the trick without the harsh side effects. If you feel you absolutely must use bleach, please make sure the bathroom is well-ventilated, dilute it properly (1 part bleach to 10 parts water), and never, ever mix it with other cleaners. Mixing bleach with ammonia-based products is especially dangerous and can create toxic gas.
What’s the Best Way to Stop Soap Scum From Building Up?
Honestly, the best way to clean shower scum is to prevent it from ever forming in the first place. An ounce of prevention is worth a pound of scrubbing, as they say.
- Switch Your Soap: Take a look at your soap. Many classic bar soaps contain talc or paraffin, which react with the minerals in your water to create that tough, filmy residue we all hate. Switching to a liquid body wash can dramatically reduce buildup.
- Squeegee After Every Shower: This is my number one tip. Wiping down the glass and tile with a squeegee takes less than a minute but removes the water and soap residue before it can dry. It’s a tiny habit that pays off in a huge way.
While you're cleaning, take a look at how your shower head is performing. If you spot a constant drip or weak spray, it might be more than just a cleaning issue. It could be a sign of a bigger problem, so you might want to read up on why your shower head might be leaking in our detailed guide.
Where Can I Find a High-Quality Shower System That's Actually Easy to Clean?
You can explore a whole range of top-tier, low-maintenance shower systems, like the beautiful Rugen shower set, right here at CRANACH. If you want to see our products up close, you can easily find a local dealer using our store locator.
For trade professionals, we have some exclusive benefits waiting for you. Feel free to explore the CRANACH Pro program or request a wholesale price book to see what we can offer.
Ready to finally upgrade your bathroom with a system that’s designed for lasting beauty and simple upkeep? Take a look at the full CRANACH Rugen shower collection and find the perfect centerpiece for your own spa-like retreat. Shop the Rugen shower set today!
Leave a Reply